


This is the second part of my two-part Getting Started with Git and GitHub blog series. In this blog, we will be focusing on working with existing projects on GitHub. There are many projects out there on GitHub to which you can contribute and get started with open source. To learn this, we first need to understand the concept of branching in Git and why we use branching
What is branching?
Branching in Git and GitHub allows developers to create separate lines of development, enabling them to work on different features or fixes without affecting the main codebase. Think of it as creating a copy of the project to experiment and develop independently, while still having the option to merge changes back into the main codebase later.
Why branching?
Real-life example: Imagine you are working on a website with your team. The website is functional, but you want to add new features like user authentication and a blog section. To avoid directly making changes to the live website (main codebase), you create a separate branch for each feature. One branch is dedicated to implementing user authentication, and another branch focuses on the blog section.
Now, team members can work simultaneously on different features without interfering with each other's code. Once a feature is complete, it can be tested independently on its branch. Once everything is thoroughly tested and reviewed, you can merge the branches back into the main codebase, making the new features available on the live website. This way, branching in Git and GitHub enables seamless collaboration and organized development on projects.
Branching in git
In the last blog, we uploaded our first project to GitHub. In that project, we will now create some branches. To create a branch, we use the git branch <branch-name> command. So, go to your project and type this command.
git branch football
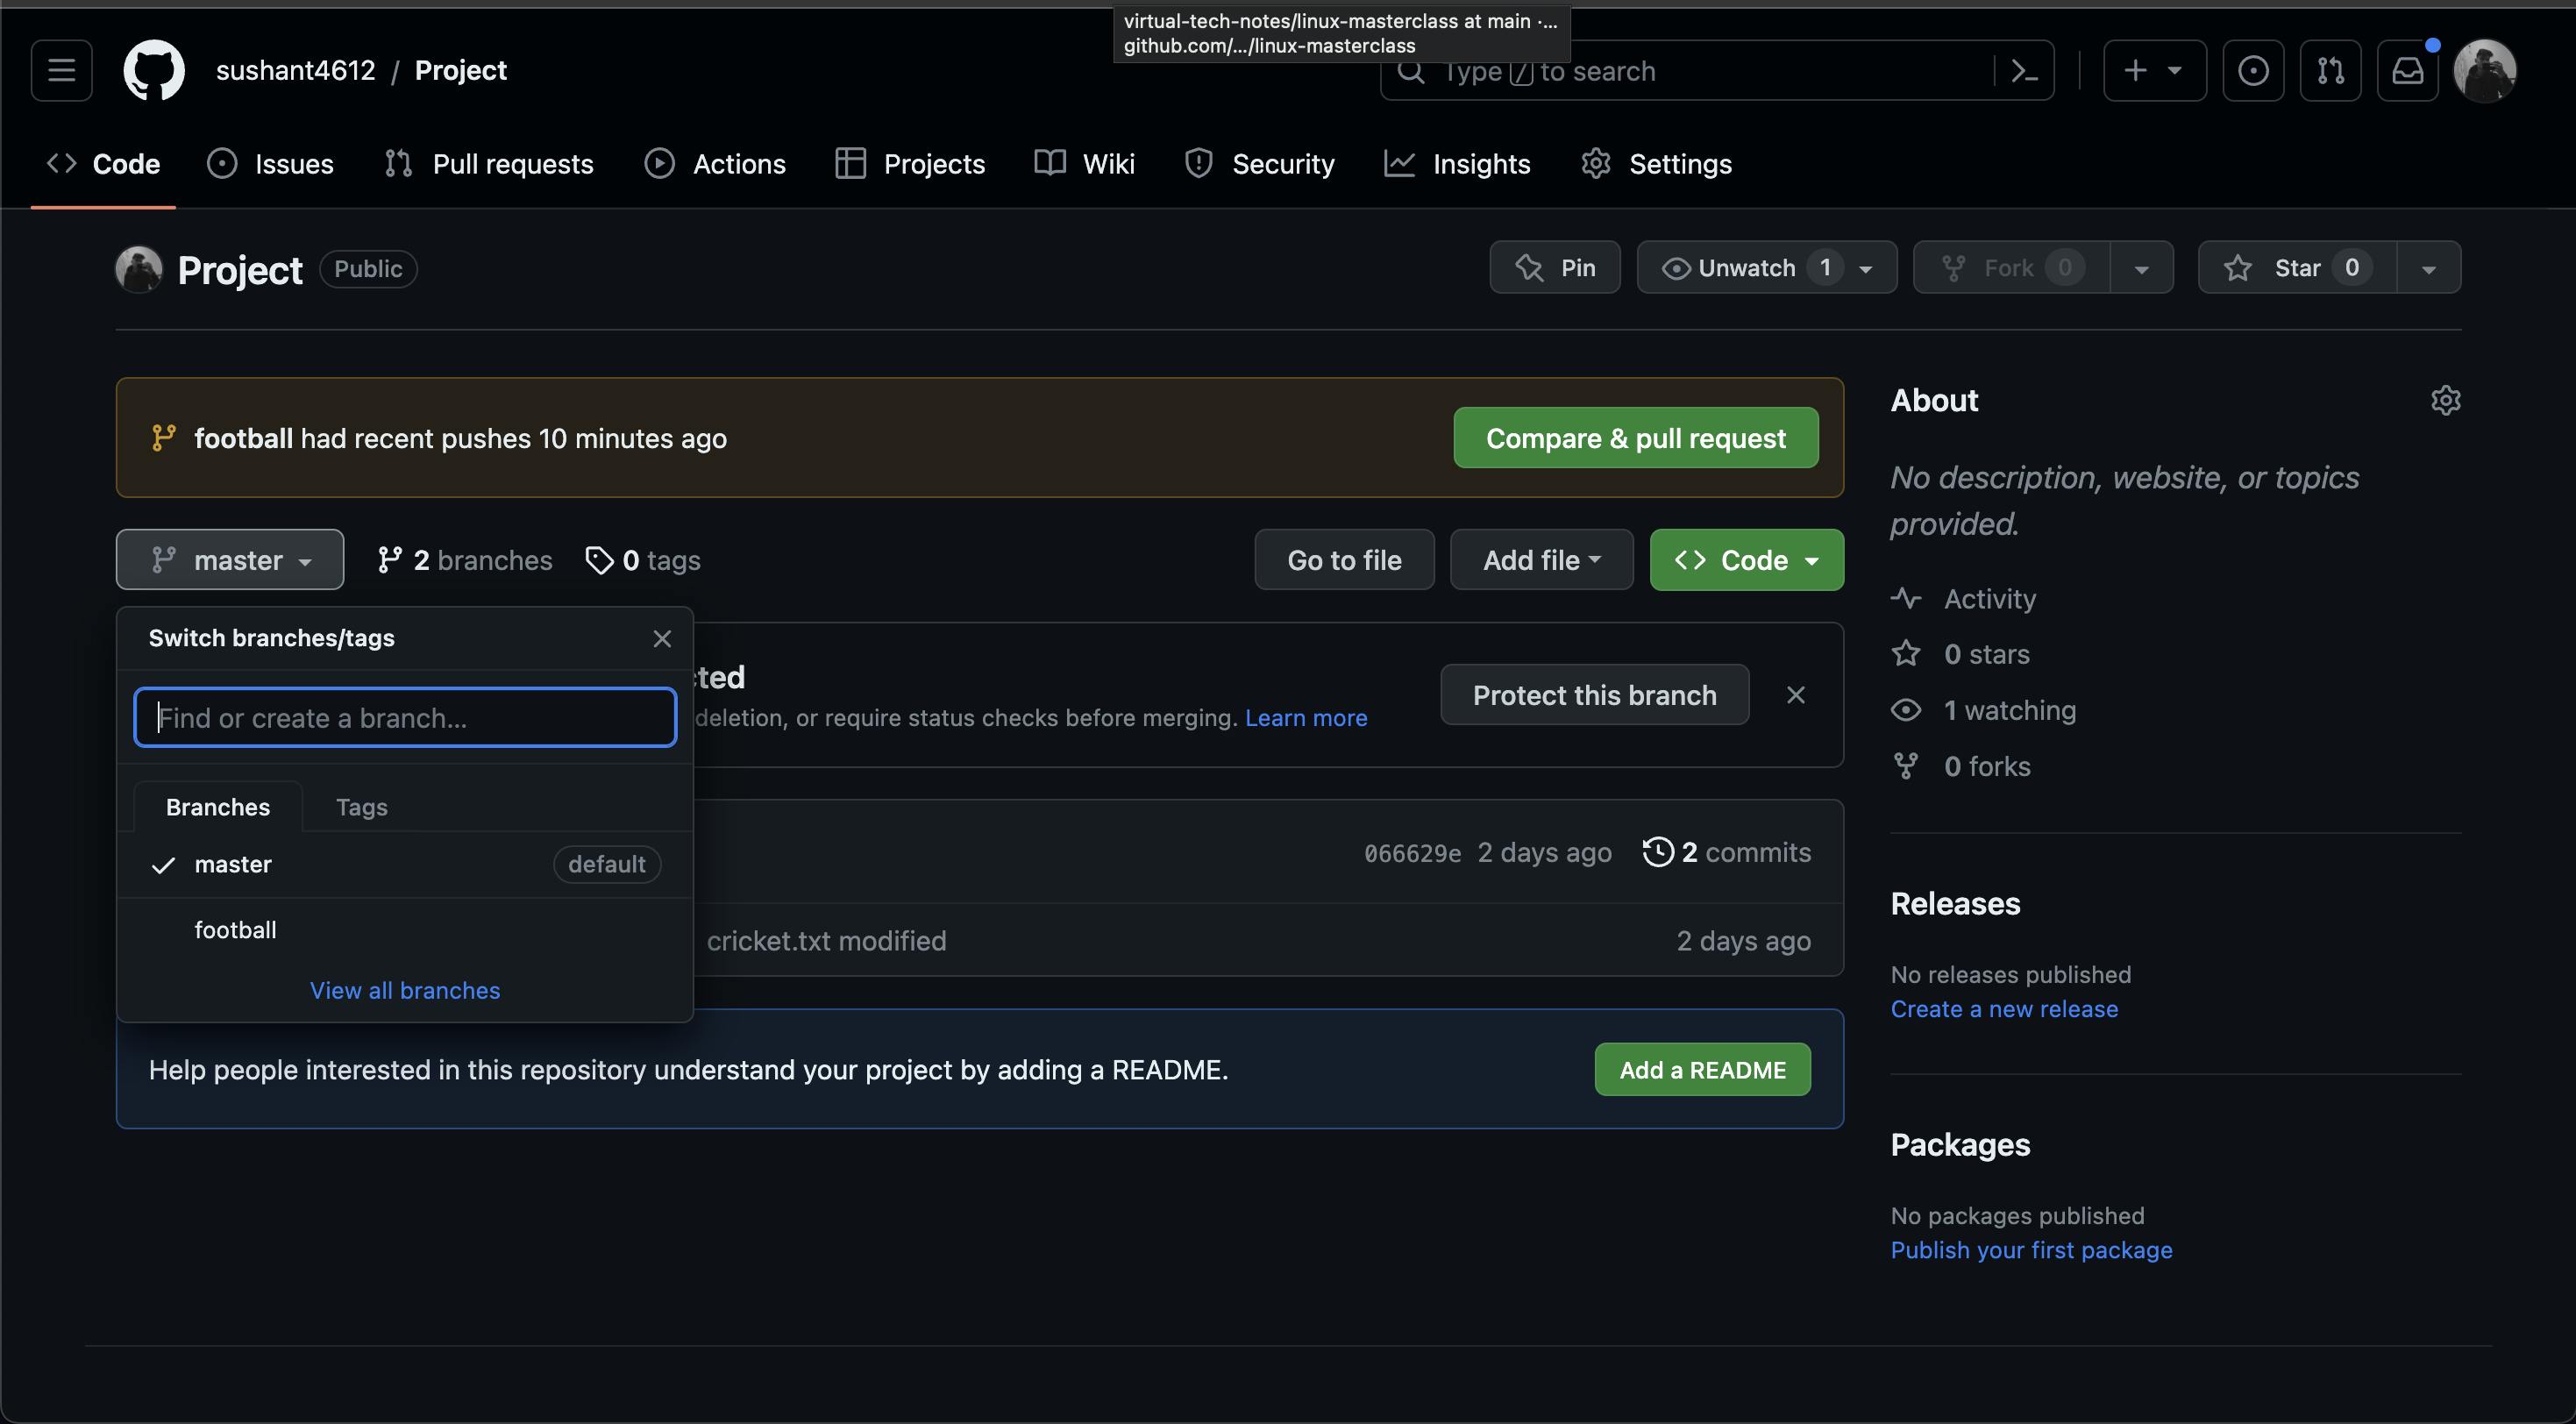
Now that you have created a branch named 'football,' you can check whether your branch is successfully created or not using the command git branch -a which lists down all the branches of the remote URL.
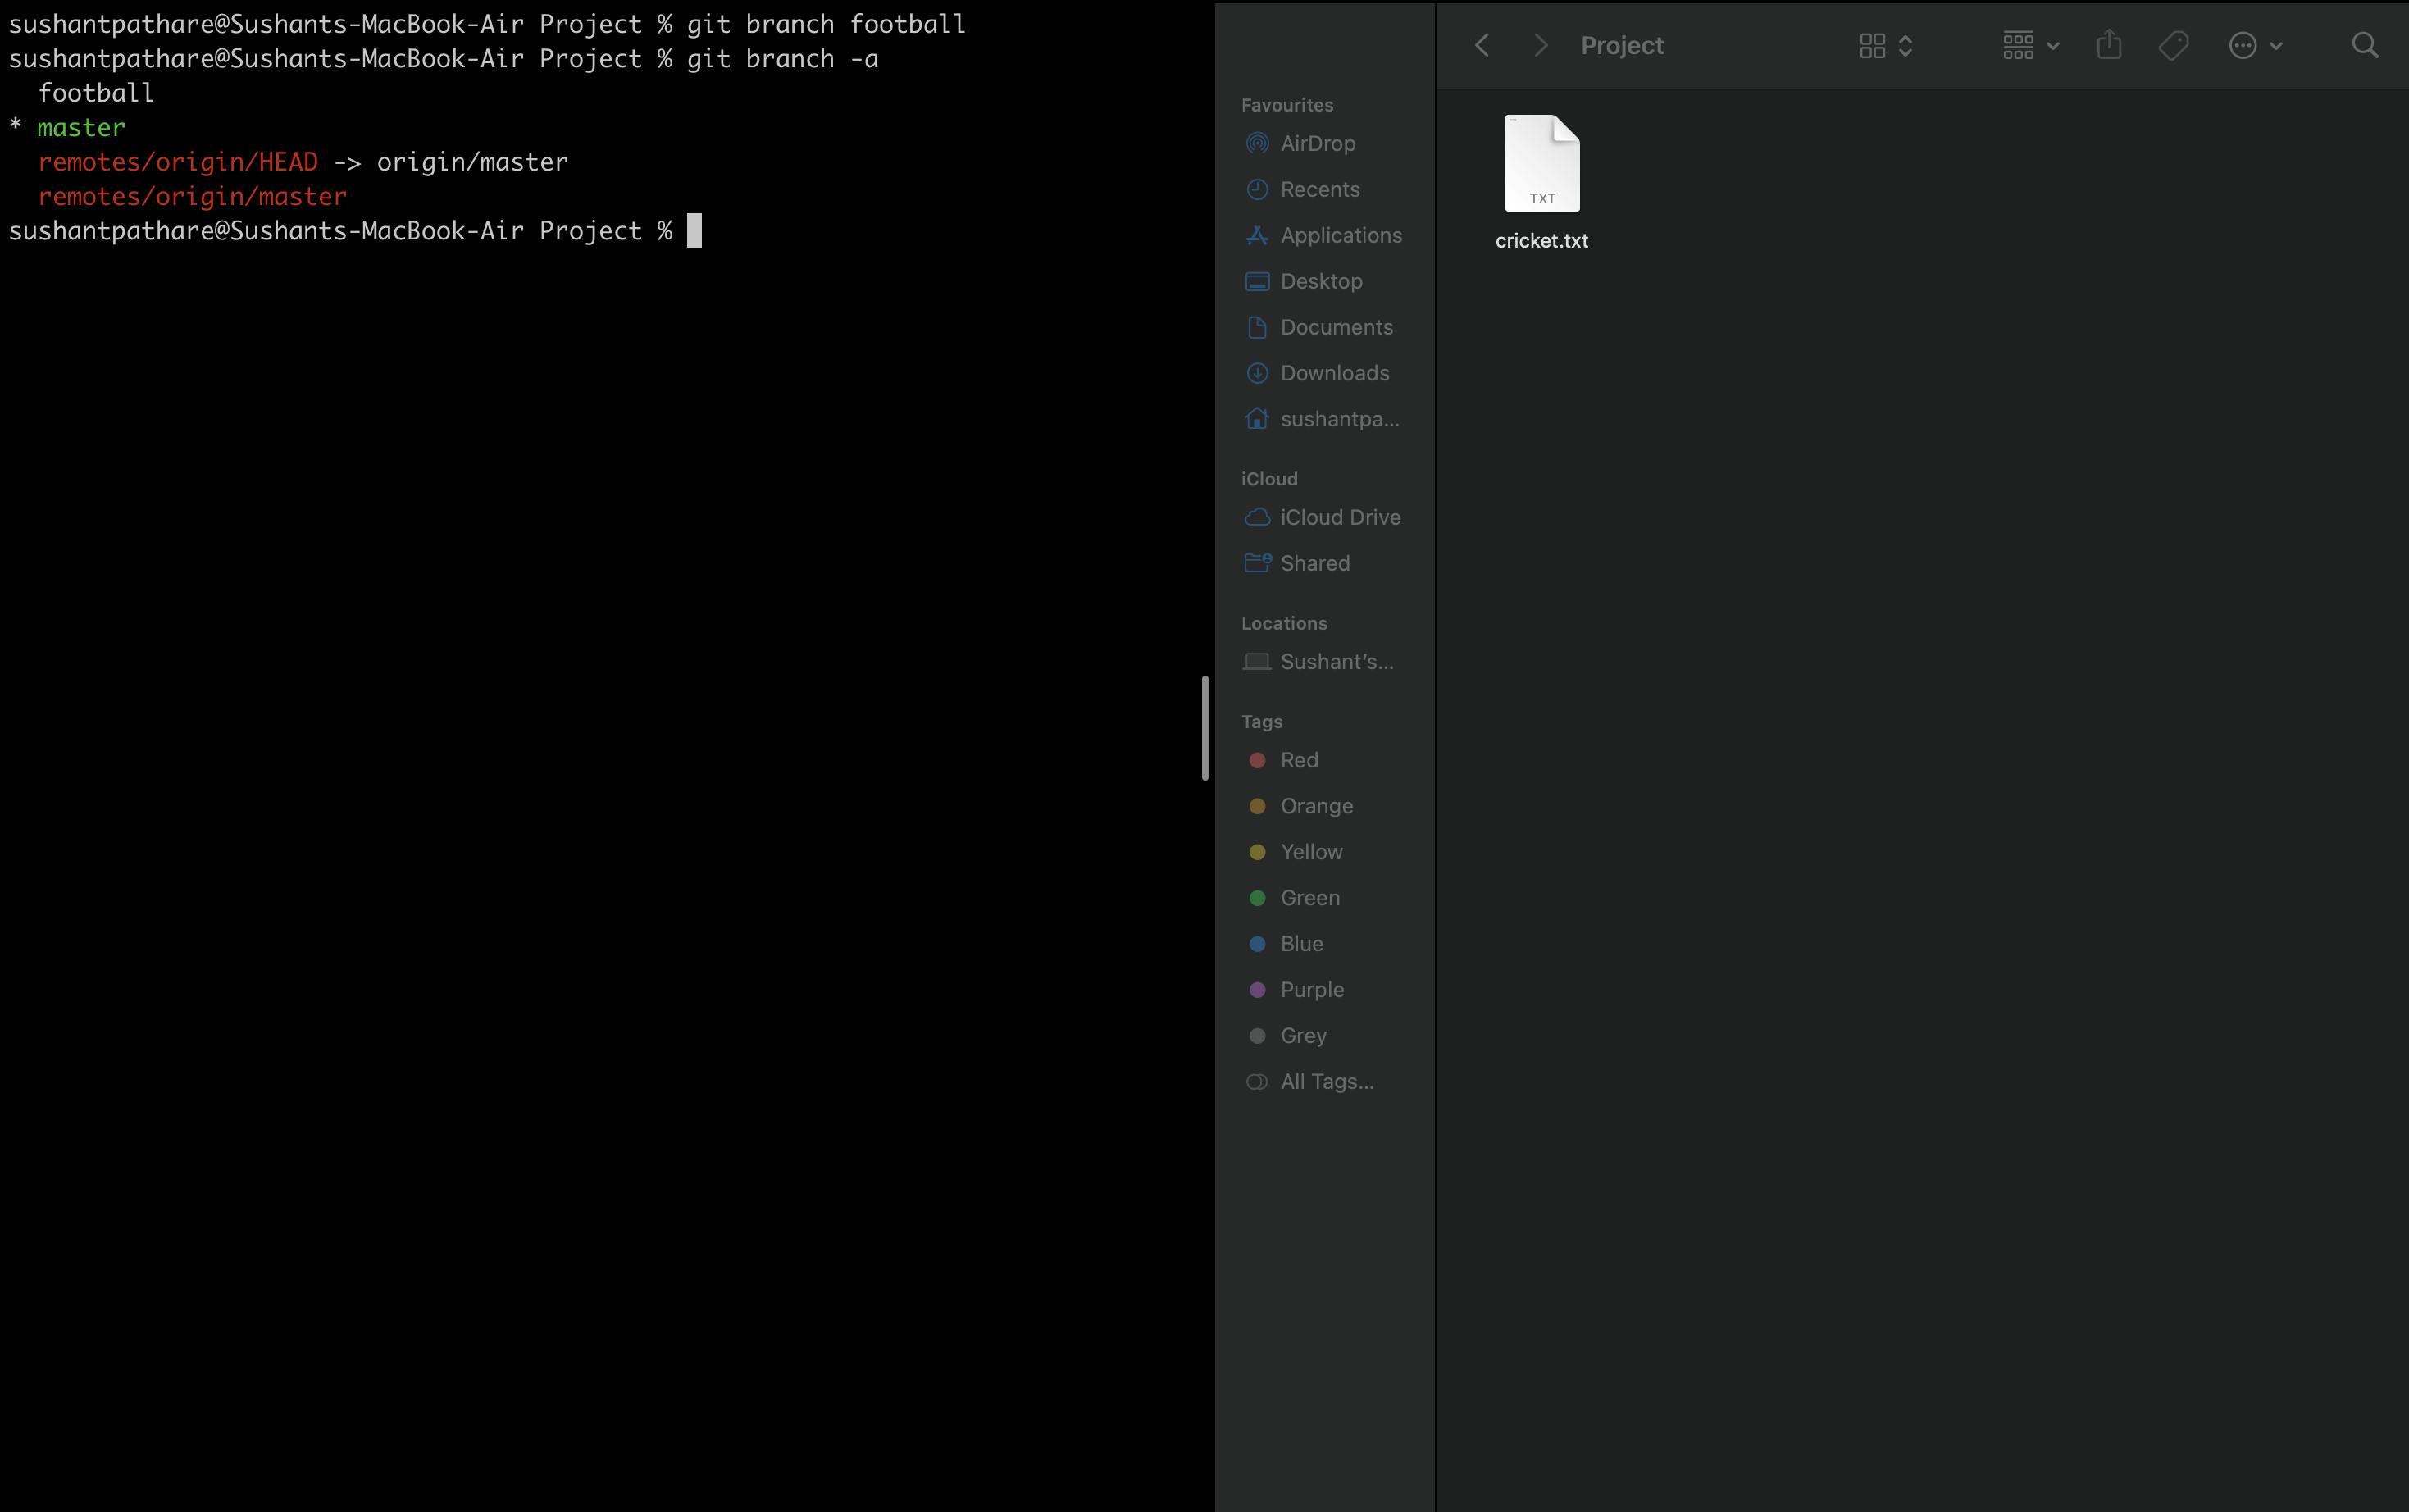
In the above image, you can see all the branches: the football branch that you created and the master branch, which is the default branch. You can view that there is an (*) asterisk in front of the master branch, which means that our head is currently on the master branch. Whatever changes we made to that file are on the 'master' branch. To switch to the football branch, we use the command called git checkout <branch-name>.
Now, in the terminal, type git checkout football and then use git branch -a to list the branches.
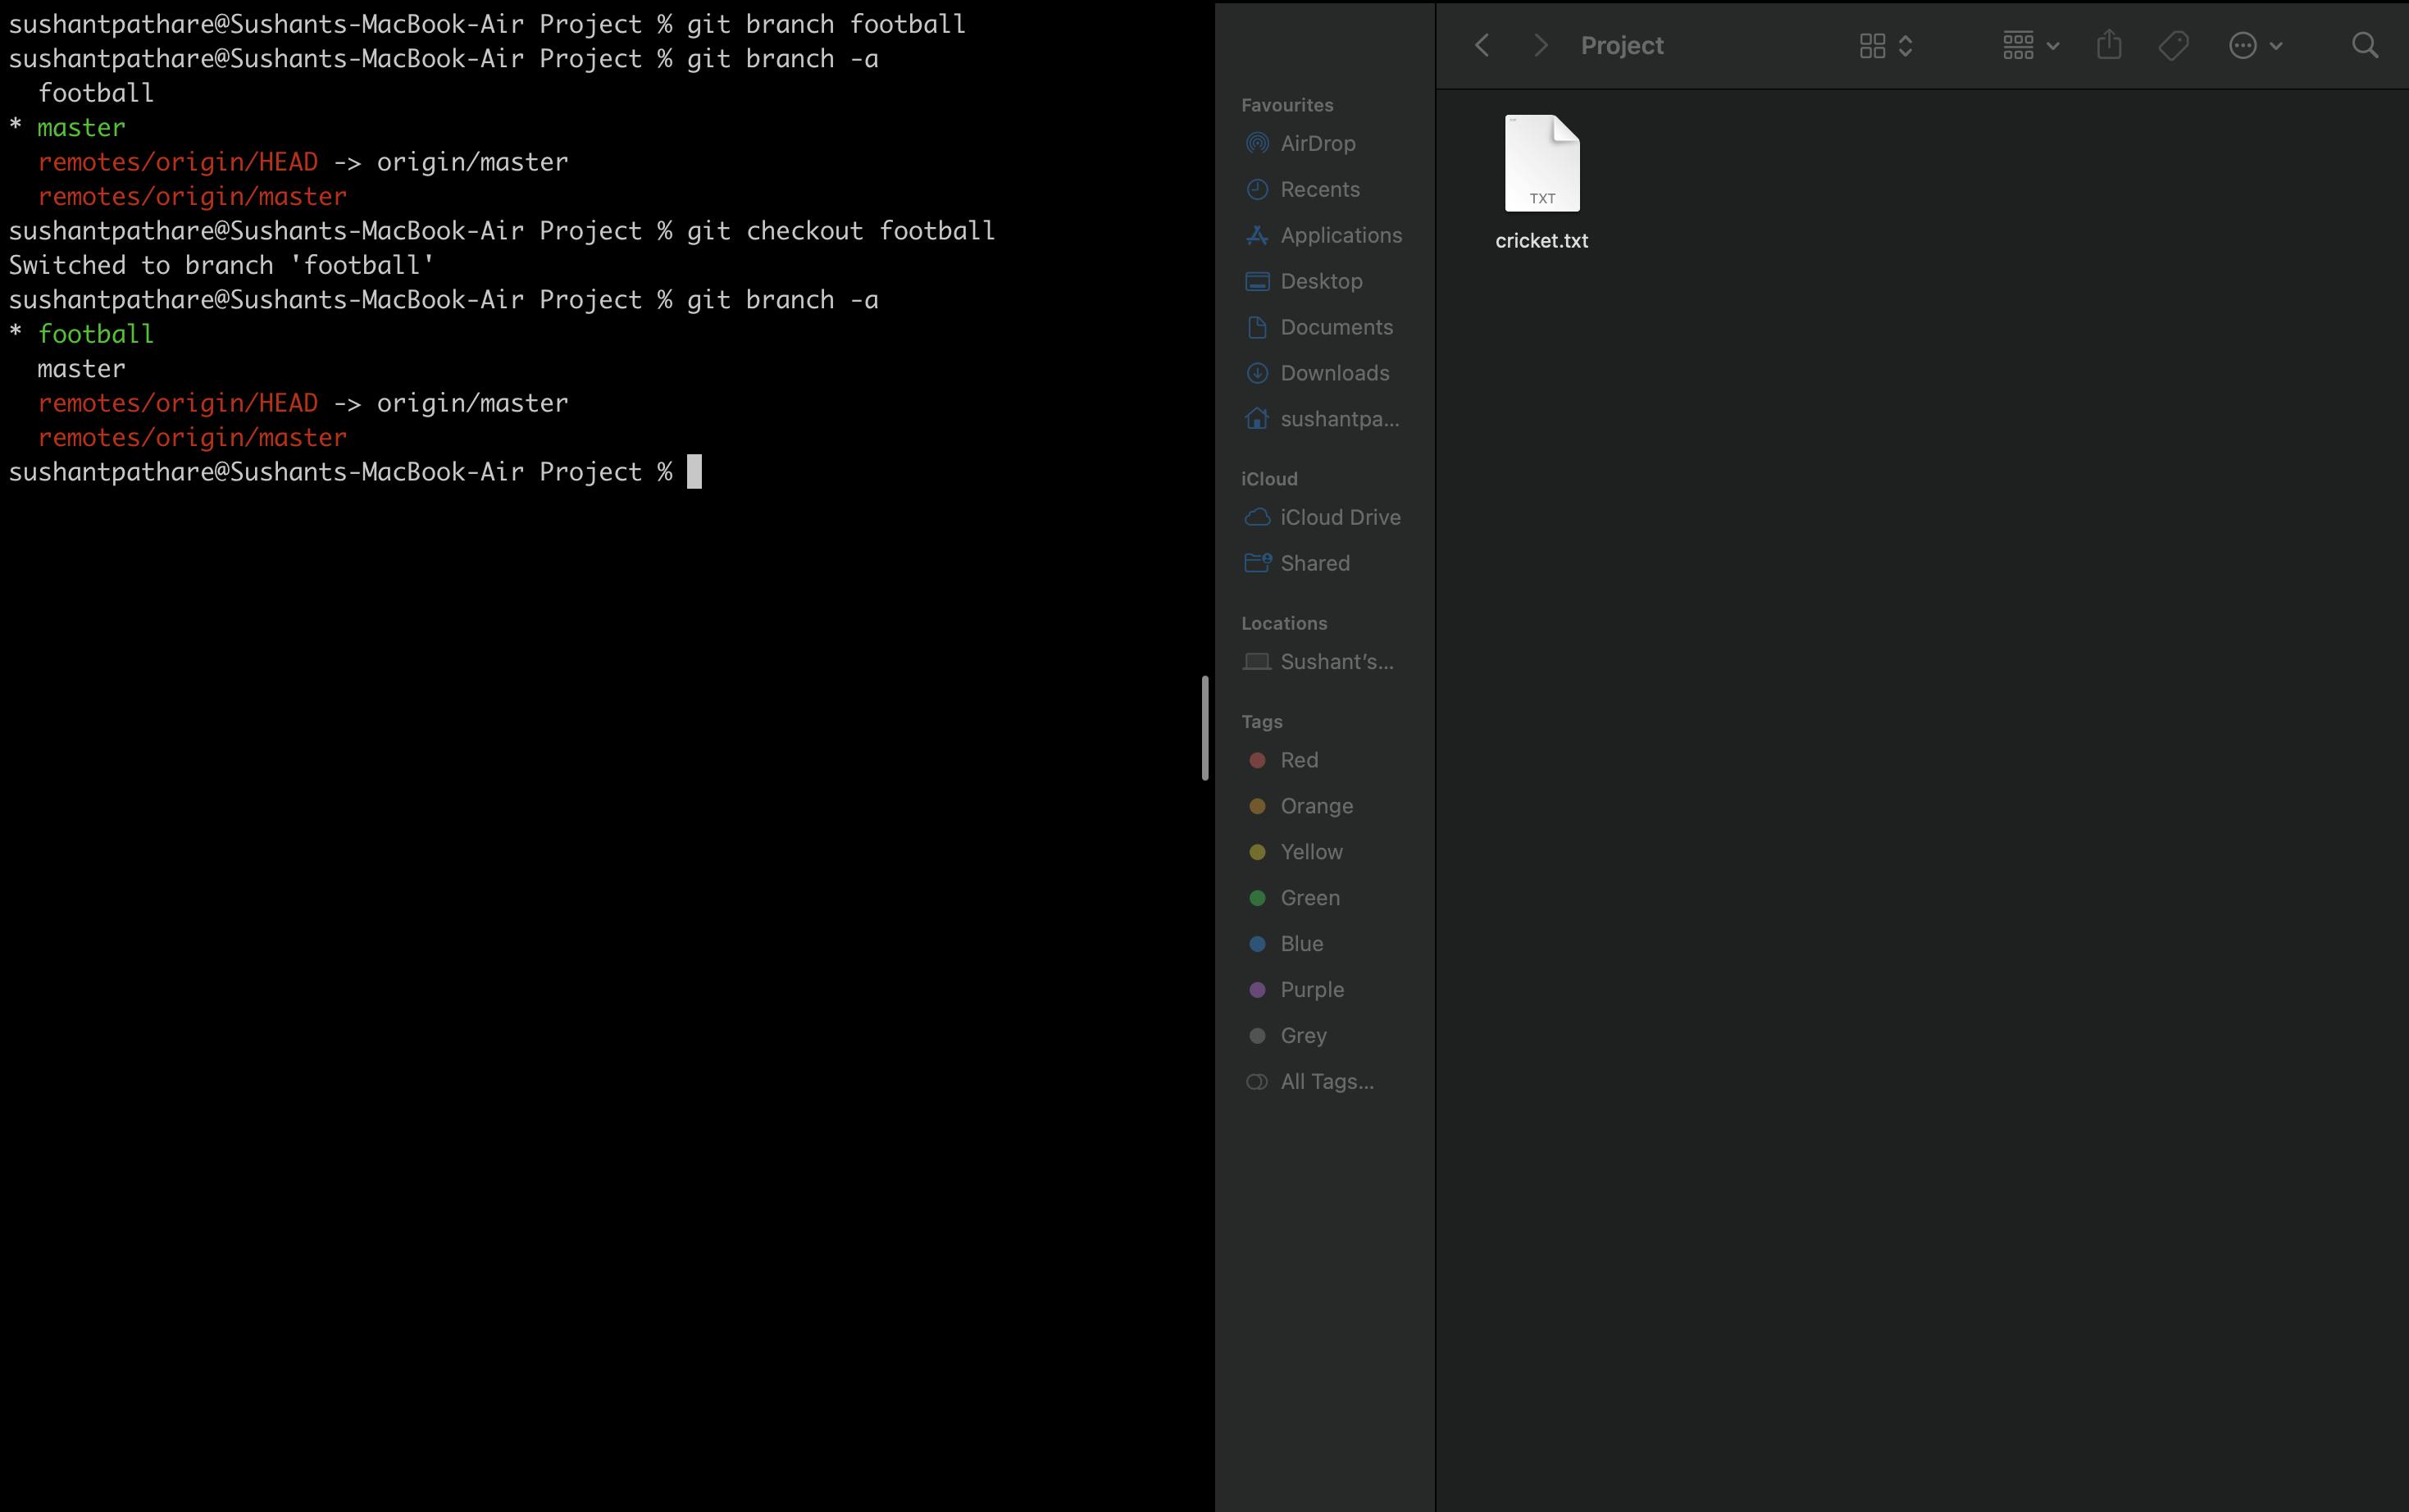
Now you can see that the (*) asterisk is now on the football branch, which means that any changes you make will be on the football branch. So, let's make some changes.
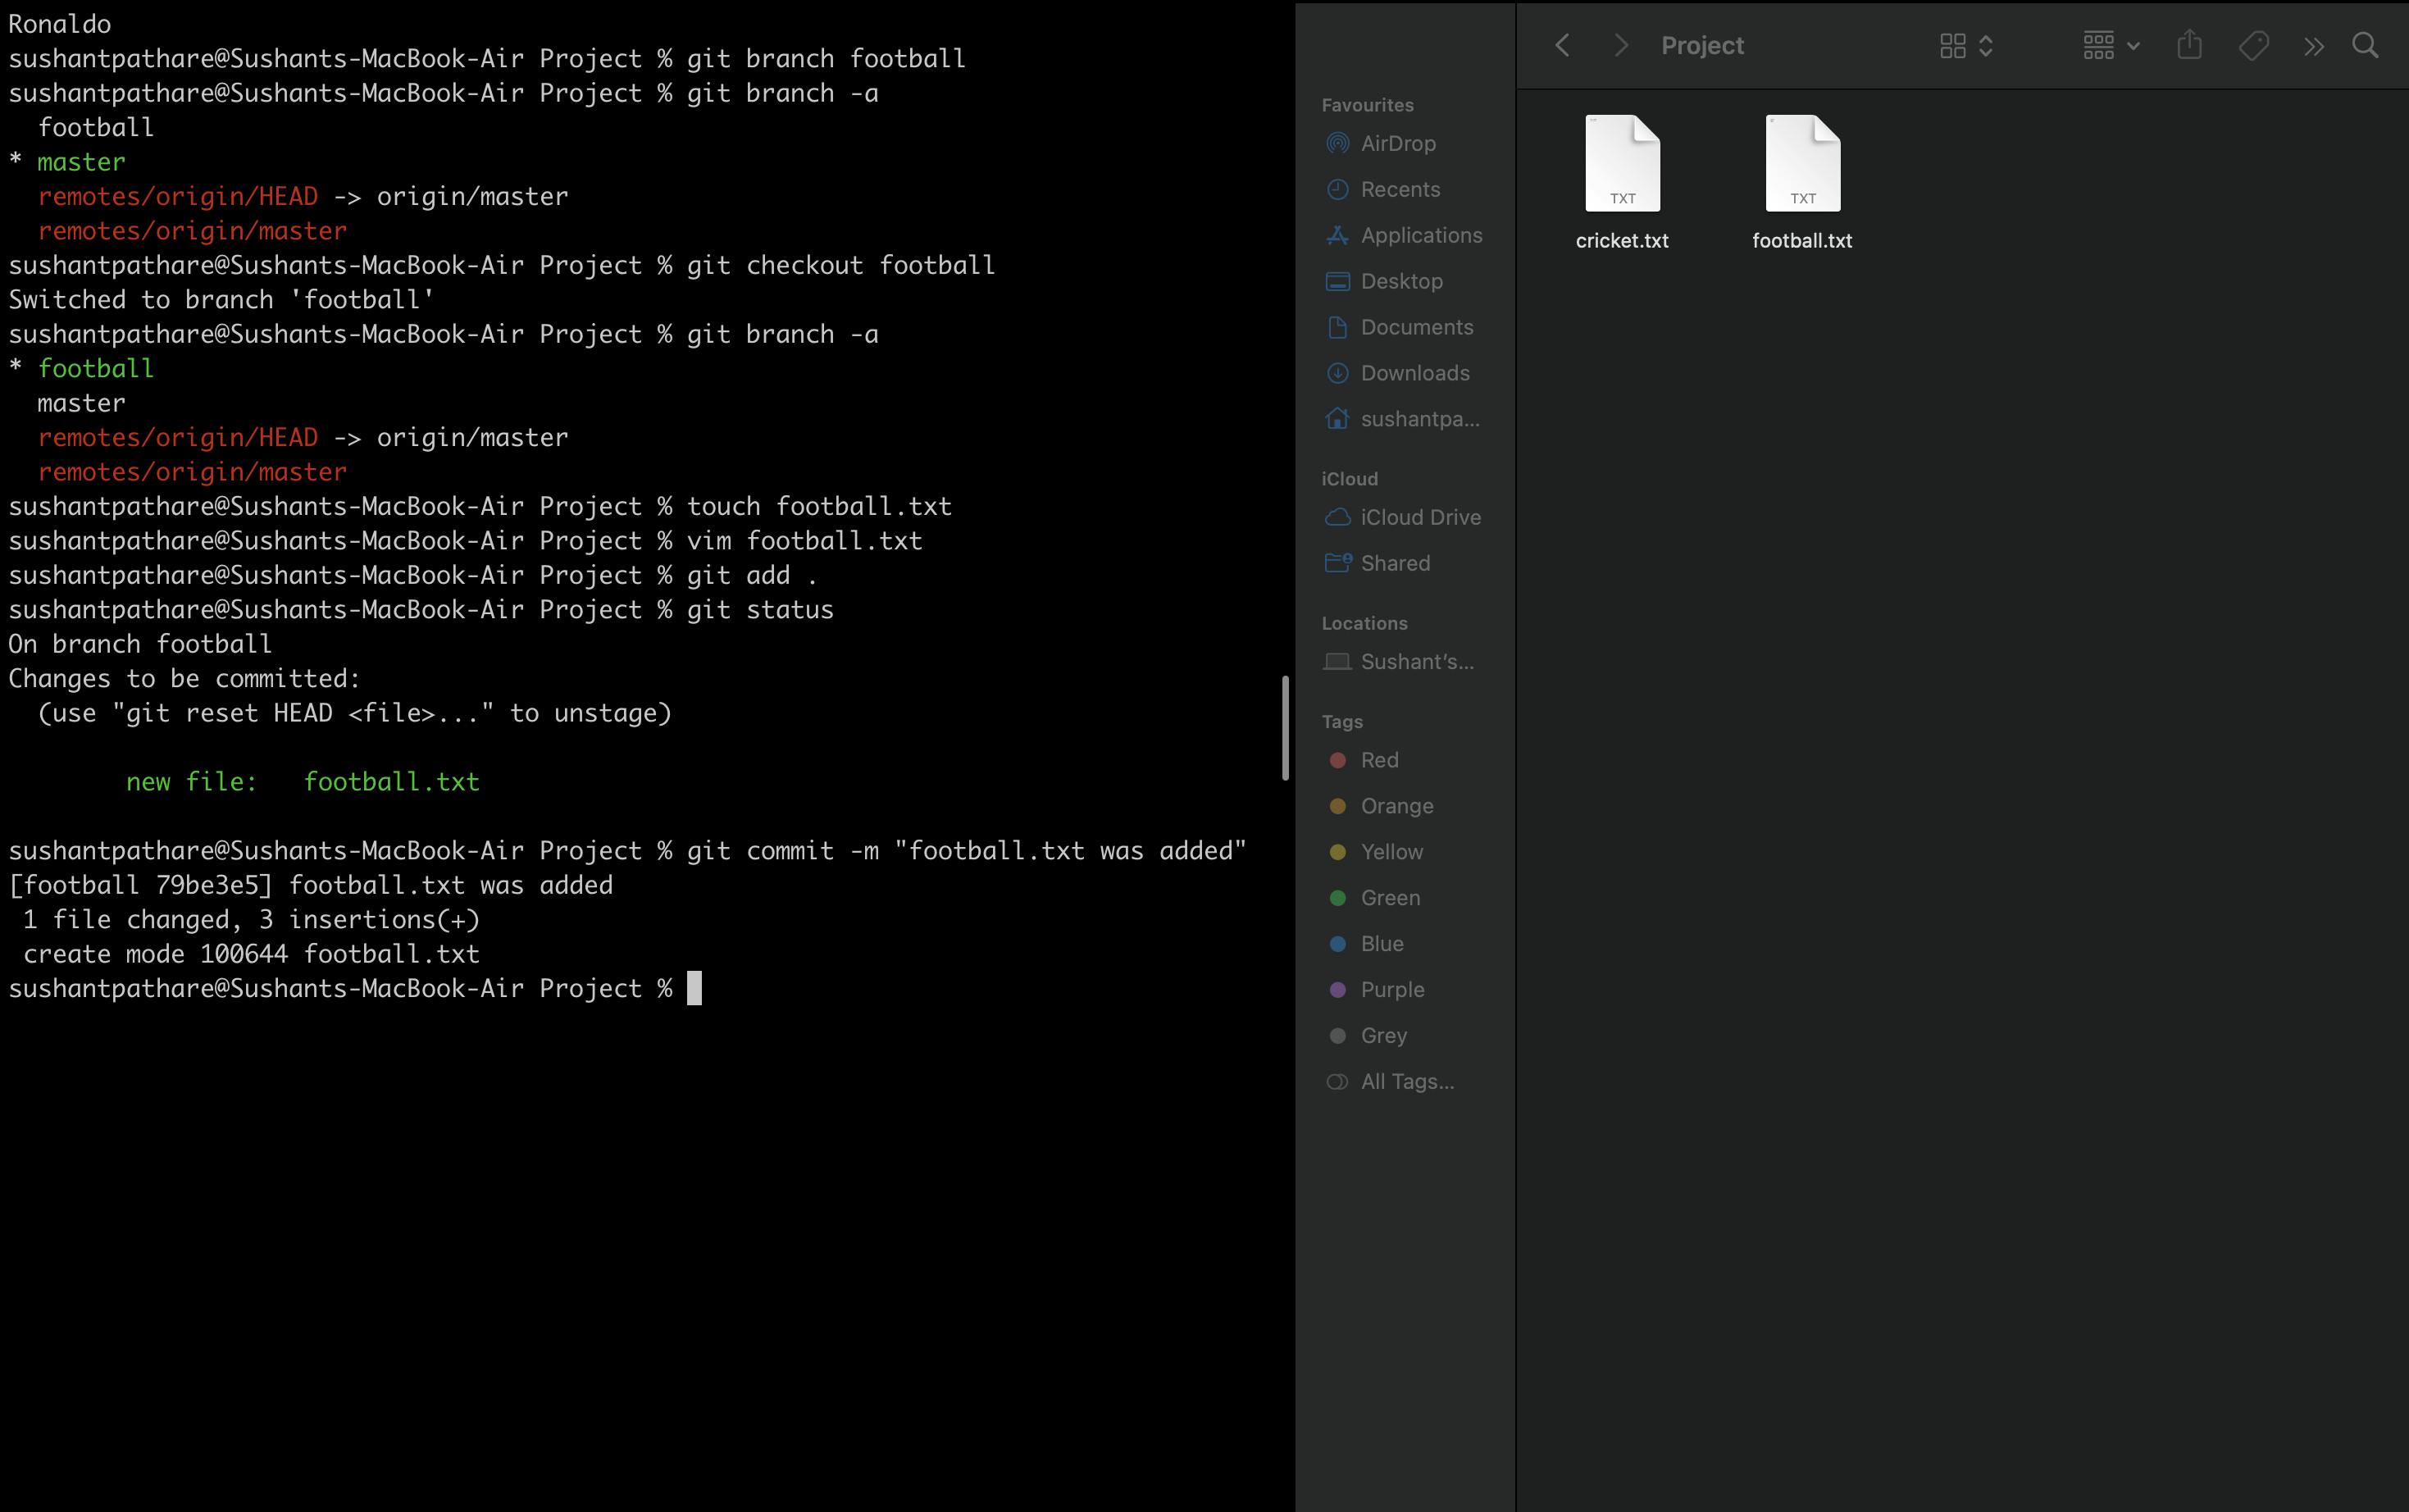
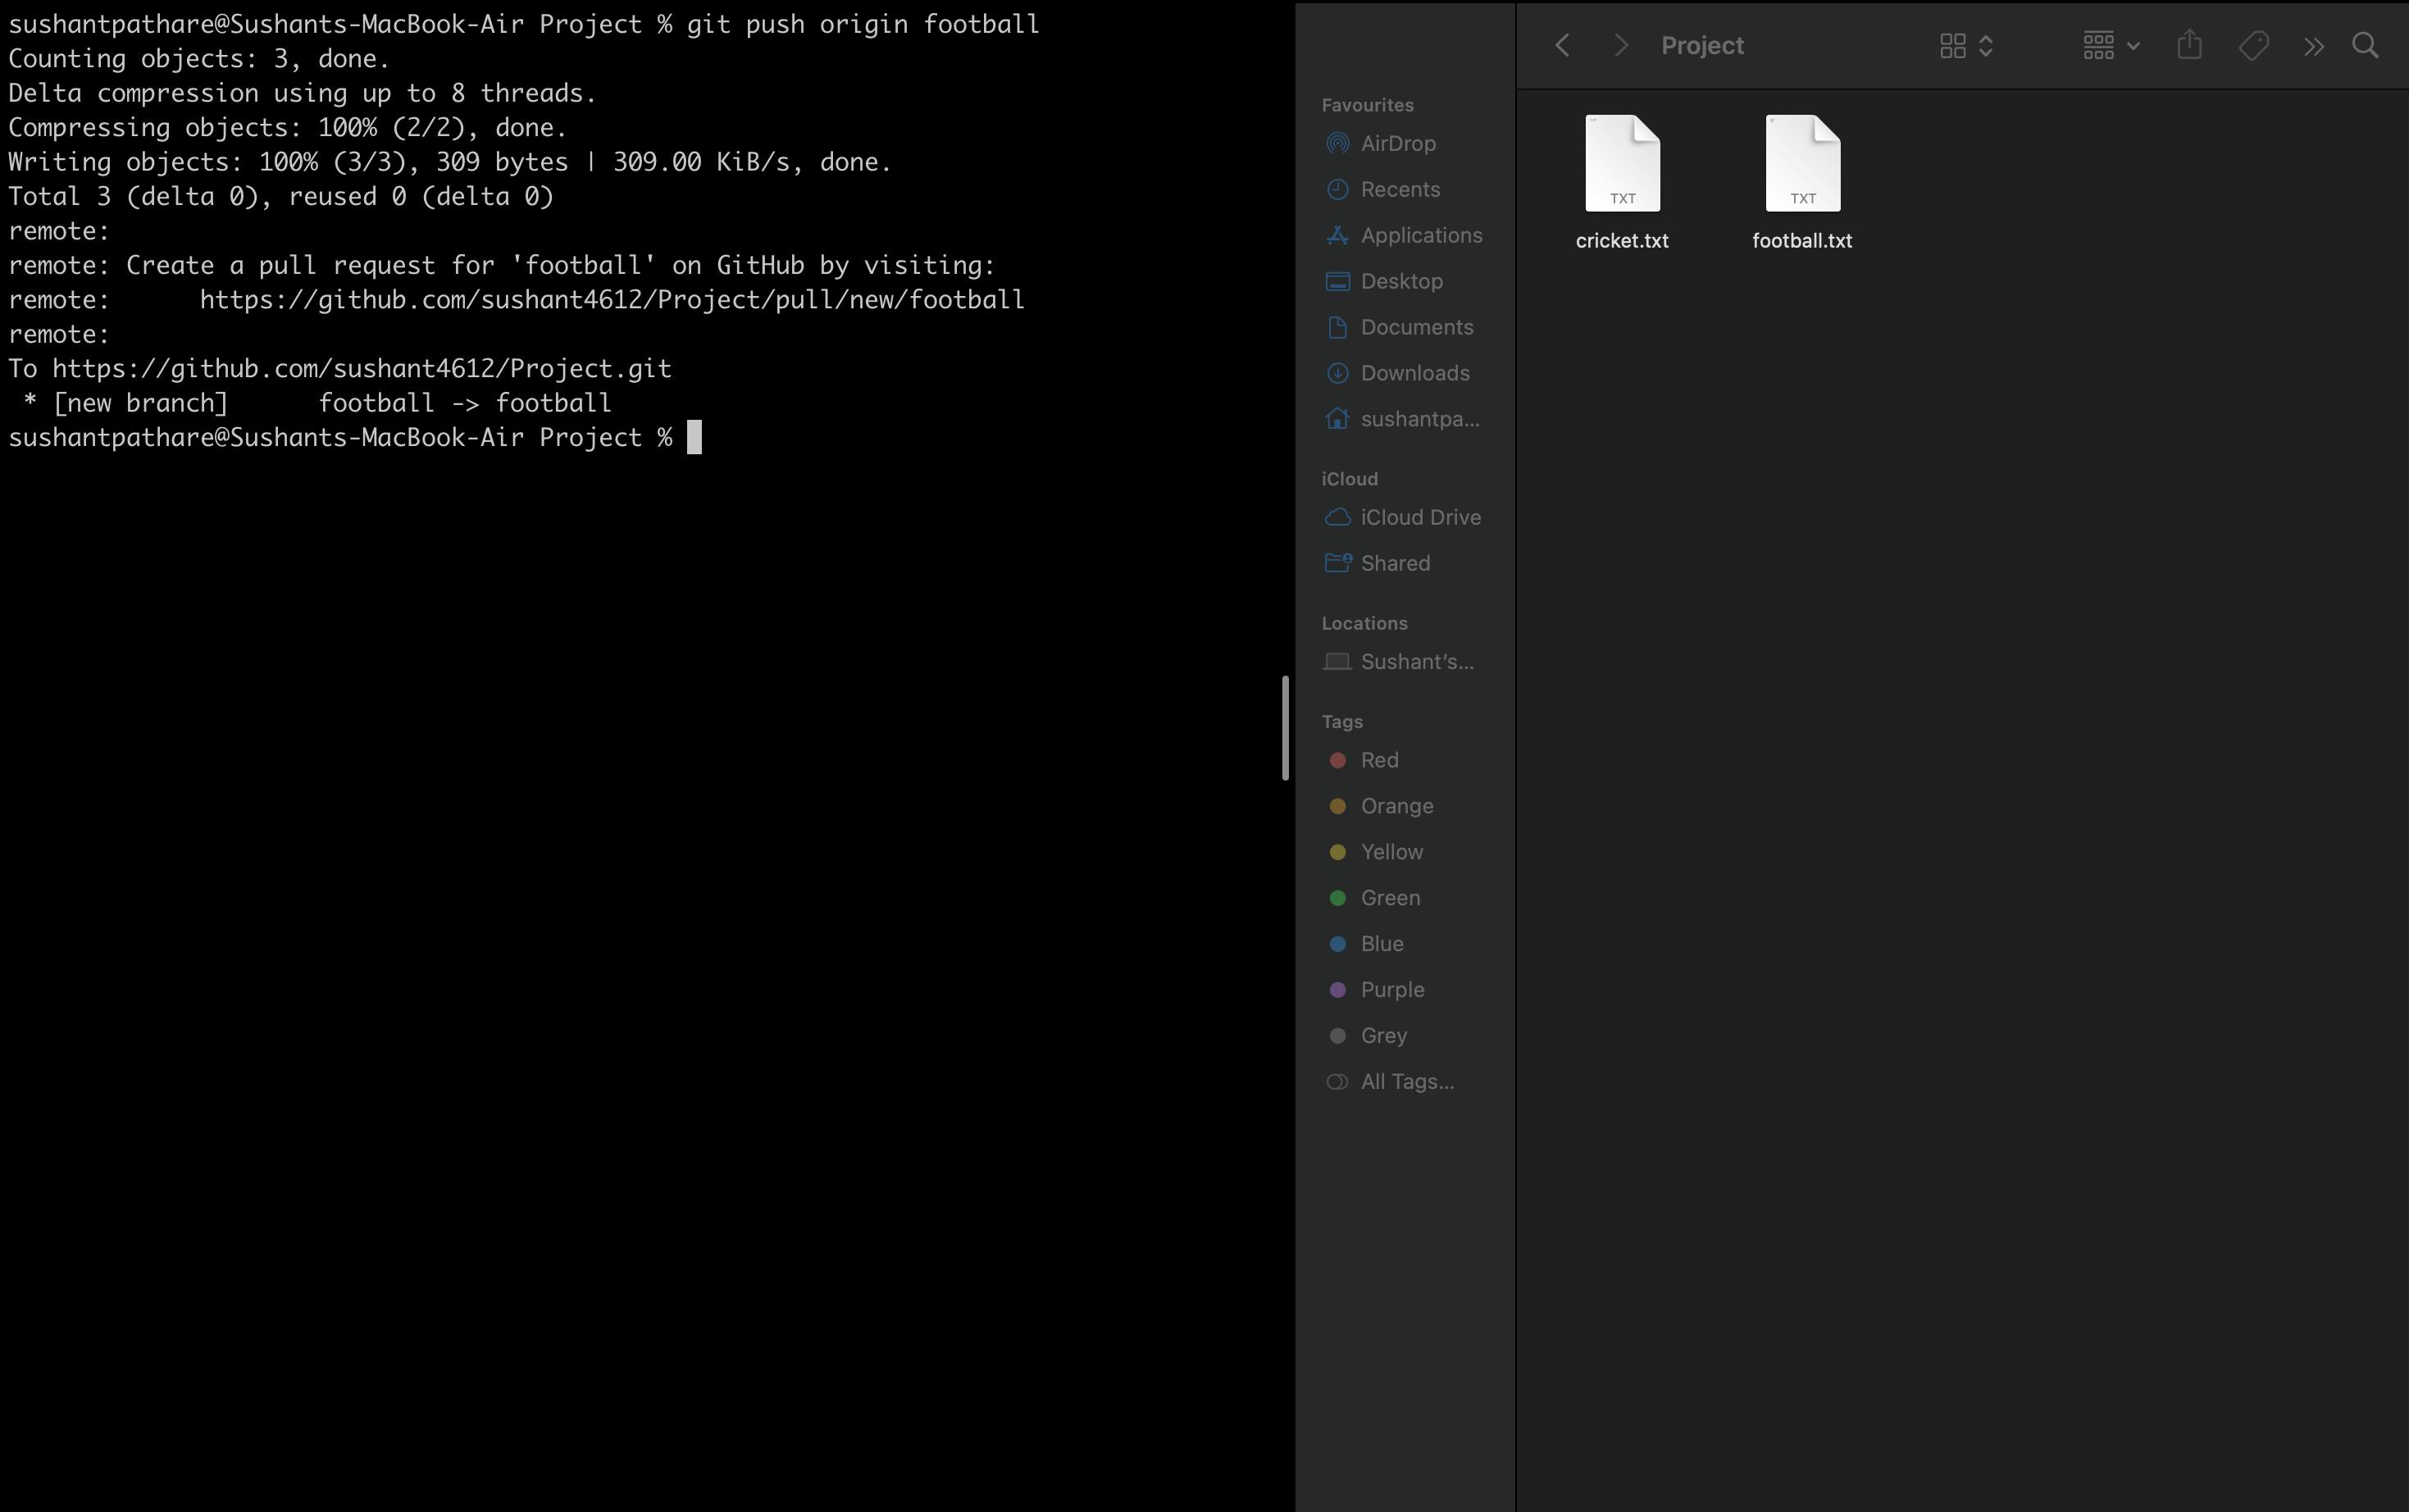
I added one text file and committed that file. Now, let's push that file to GitHub. The command is git push origin <branch-name>. Since we want to push to the football branch, we have to type git push origin football.
Now when you go to your GitHub repo to go to your repo, just type git remote -v, and it will show you all the URLs attached to your project.
You will get links; go to the link, and when you go there, you will see that there isn't any football.txt file added because you are in the master branch. Just change the branch to football and you will be shown all the changes you made.
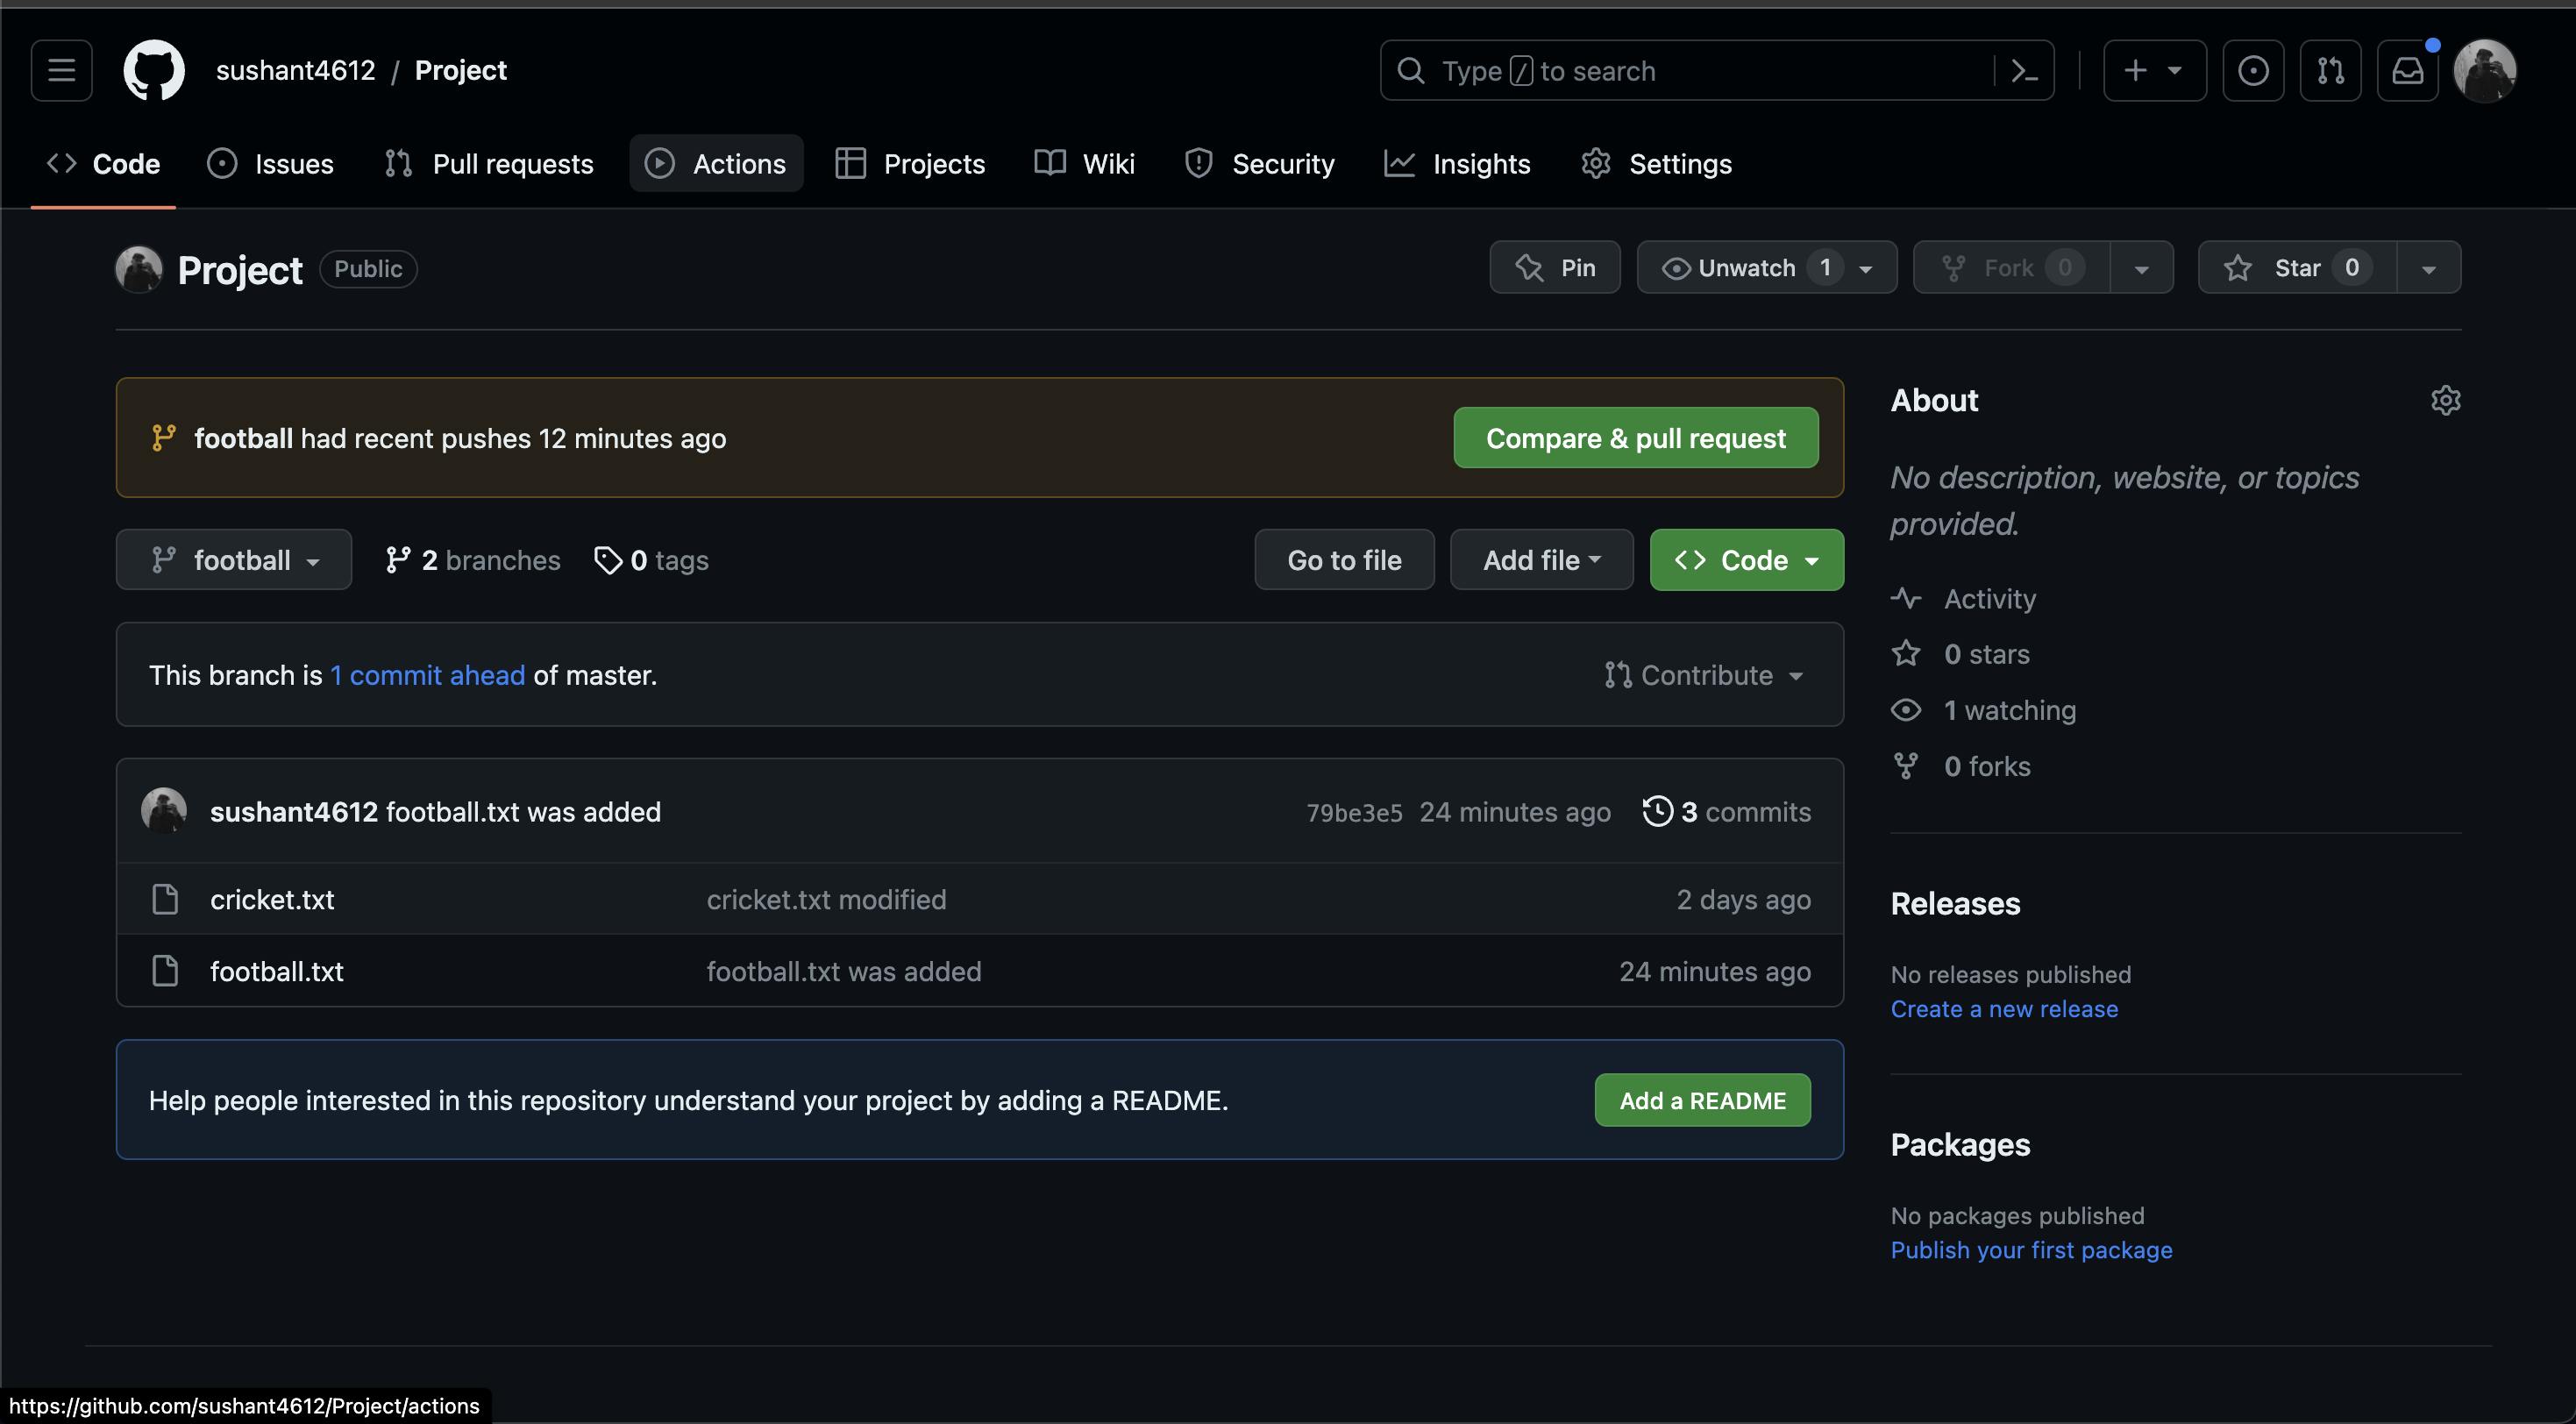
Now, to merge it with our main branch, you have two ways to do it. You can see there is one green button popping up that says Compare & pull request. You can use that, but for now, let's do it with the command line. Go to the terminal and checkout to the branch you want to merge; in most cases, it is the main/master branch. Then, type git merge <branch-name>.
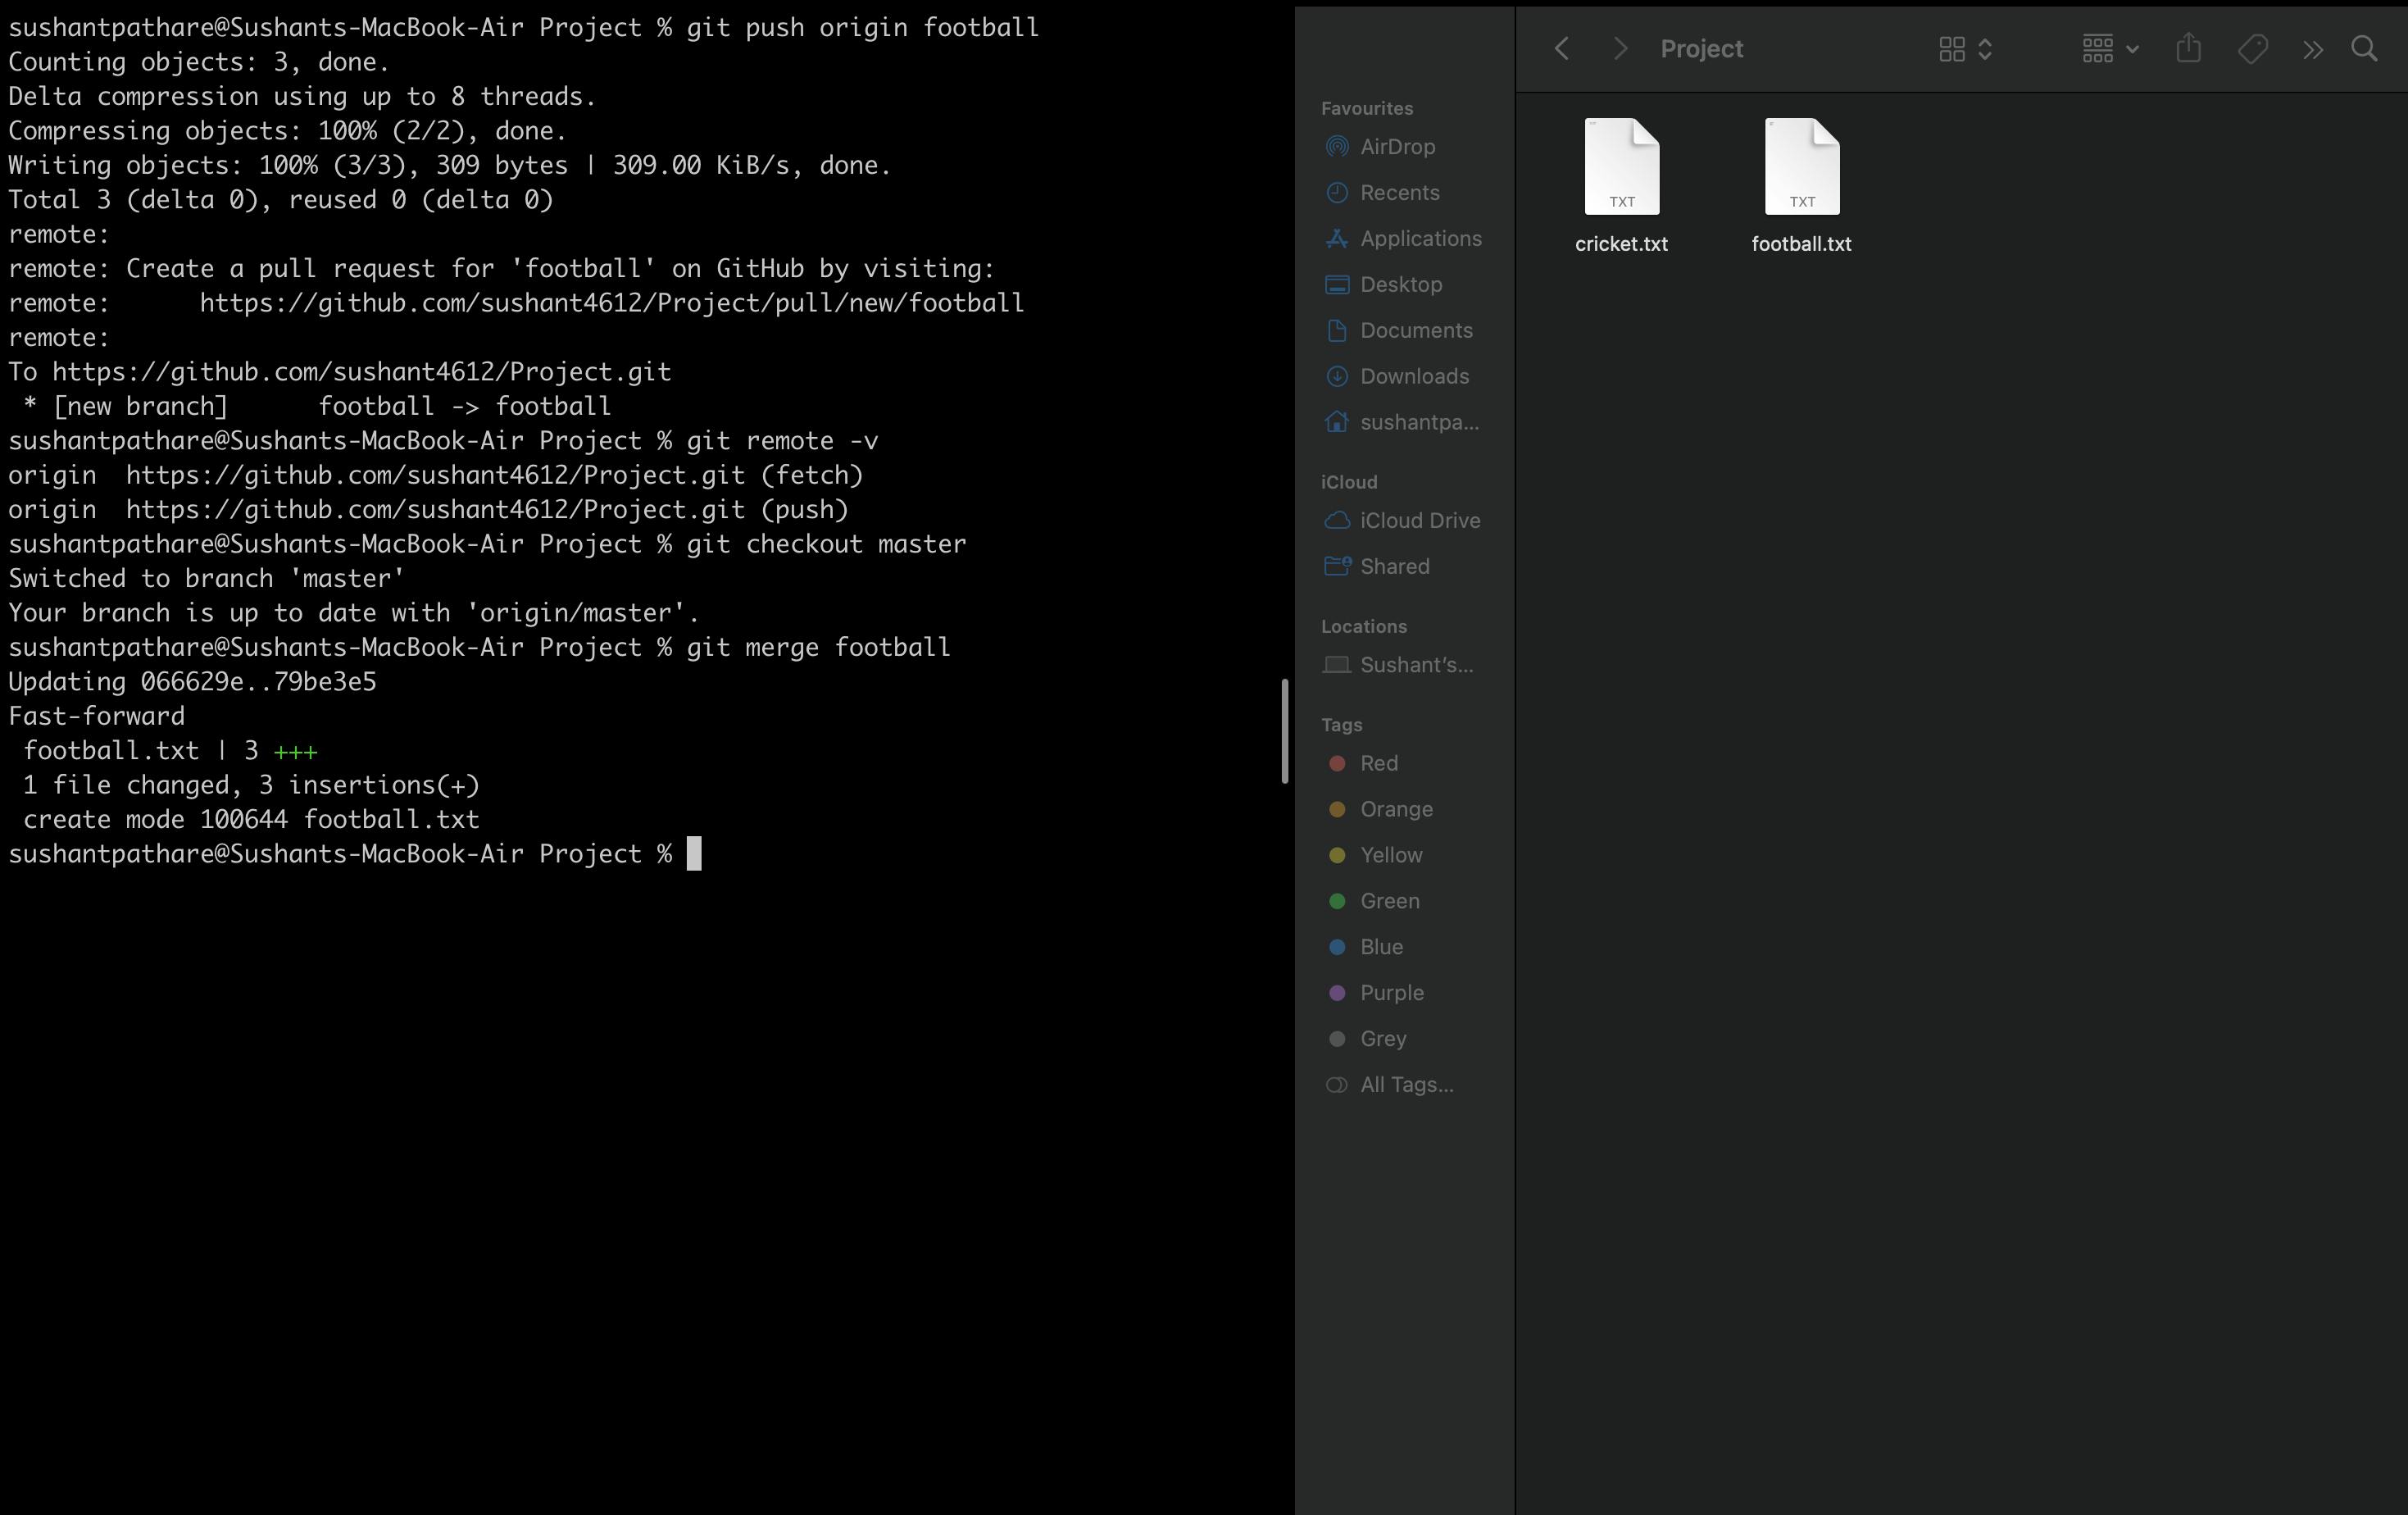
To push the changes, use git push origin master, and now you have merged both branches. Now, when you go to GitHub and see that the master branch also has the football.txt file, both branches are merged.
Now let's delete that branch. To delete a branch, we use the command git branch --delete <branchname>
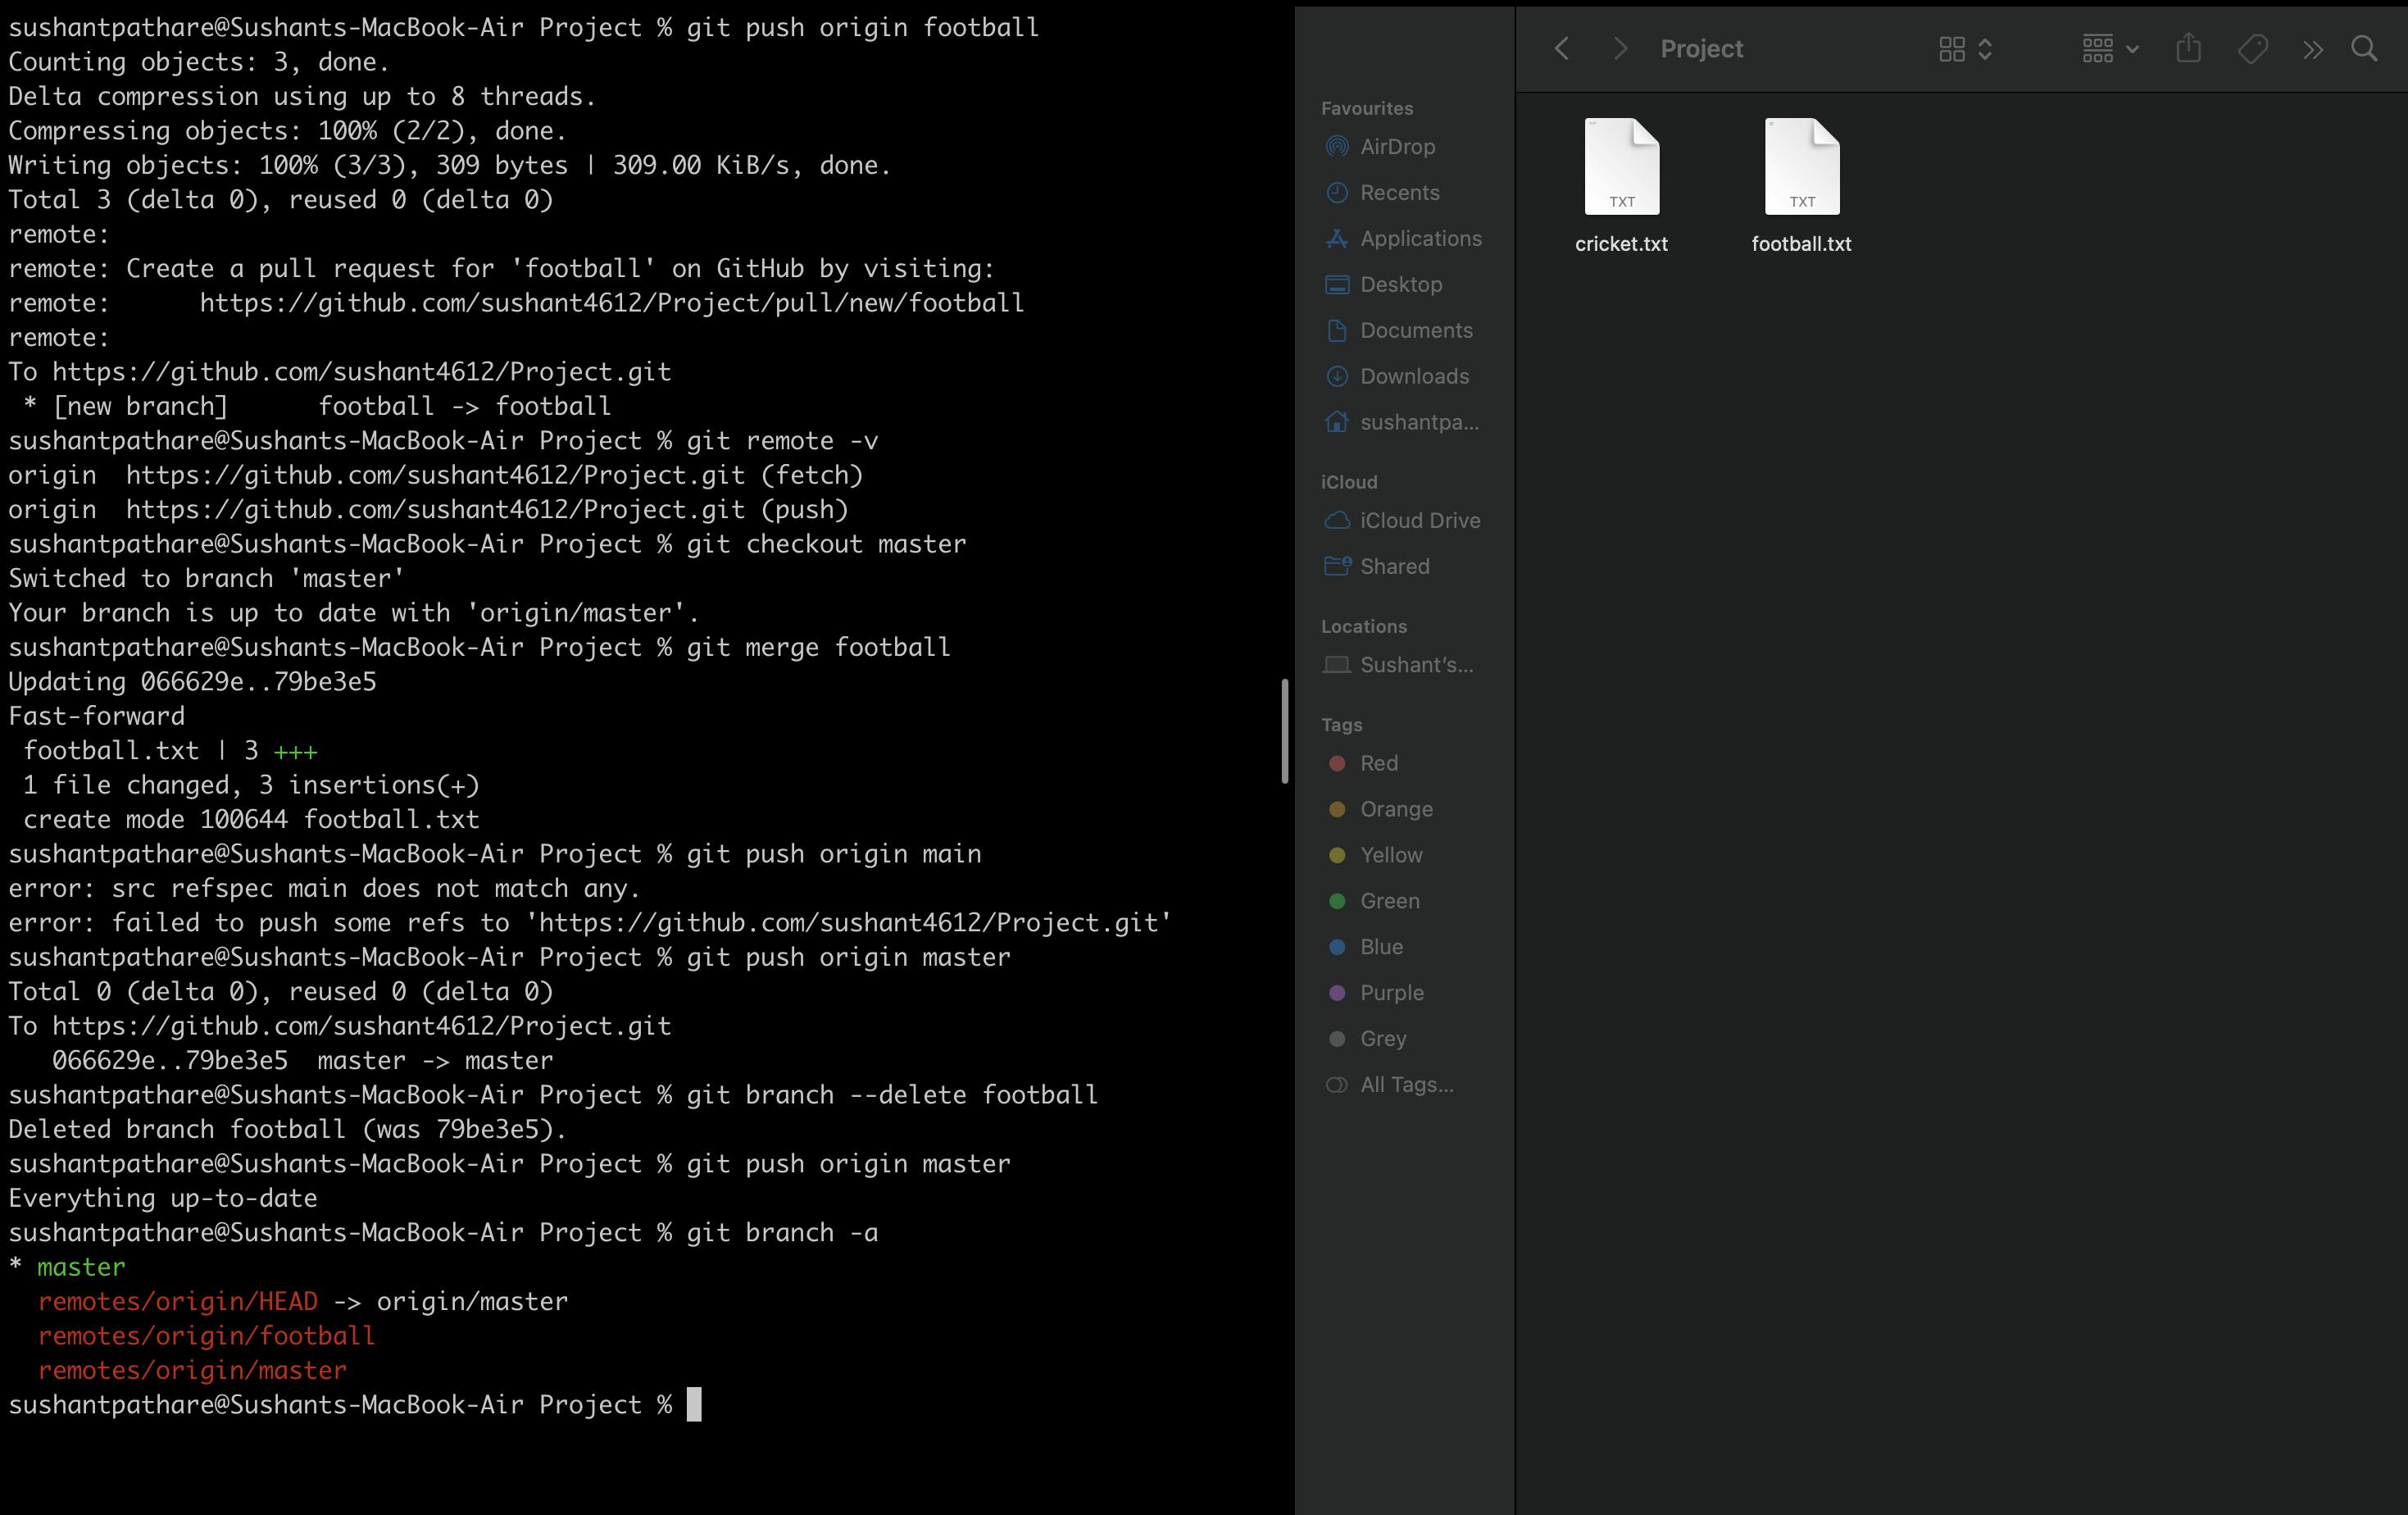
It's still available on your GitHub. To delete it from GitHub, type git push origin --delete <branch-Name>.
In our case :
git push delete origin --delete football
Make your first pull request on GitHub
Let's assume there is a repository you love or a project you want to contribute to. To do so, you want to make a copy of that project on your system. In order to achieve this, you need to first fork the project. So, what is forking?
What is Forking?
Forking in Git and GitHub is the process of creating a personal copy of someone else's repository on GitHub, allowing you to freely experiment and make changes without affecting the original project. It is a fundamental mechanism for open-source collaboration, enabling contributors to propose changes and improvements to projects they are interested in.
Let's learn this with an example:
There is one project on vaishali86c's account named nice-project that you want to fork.
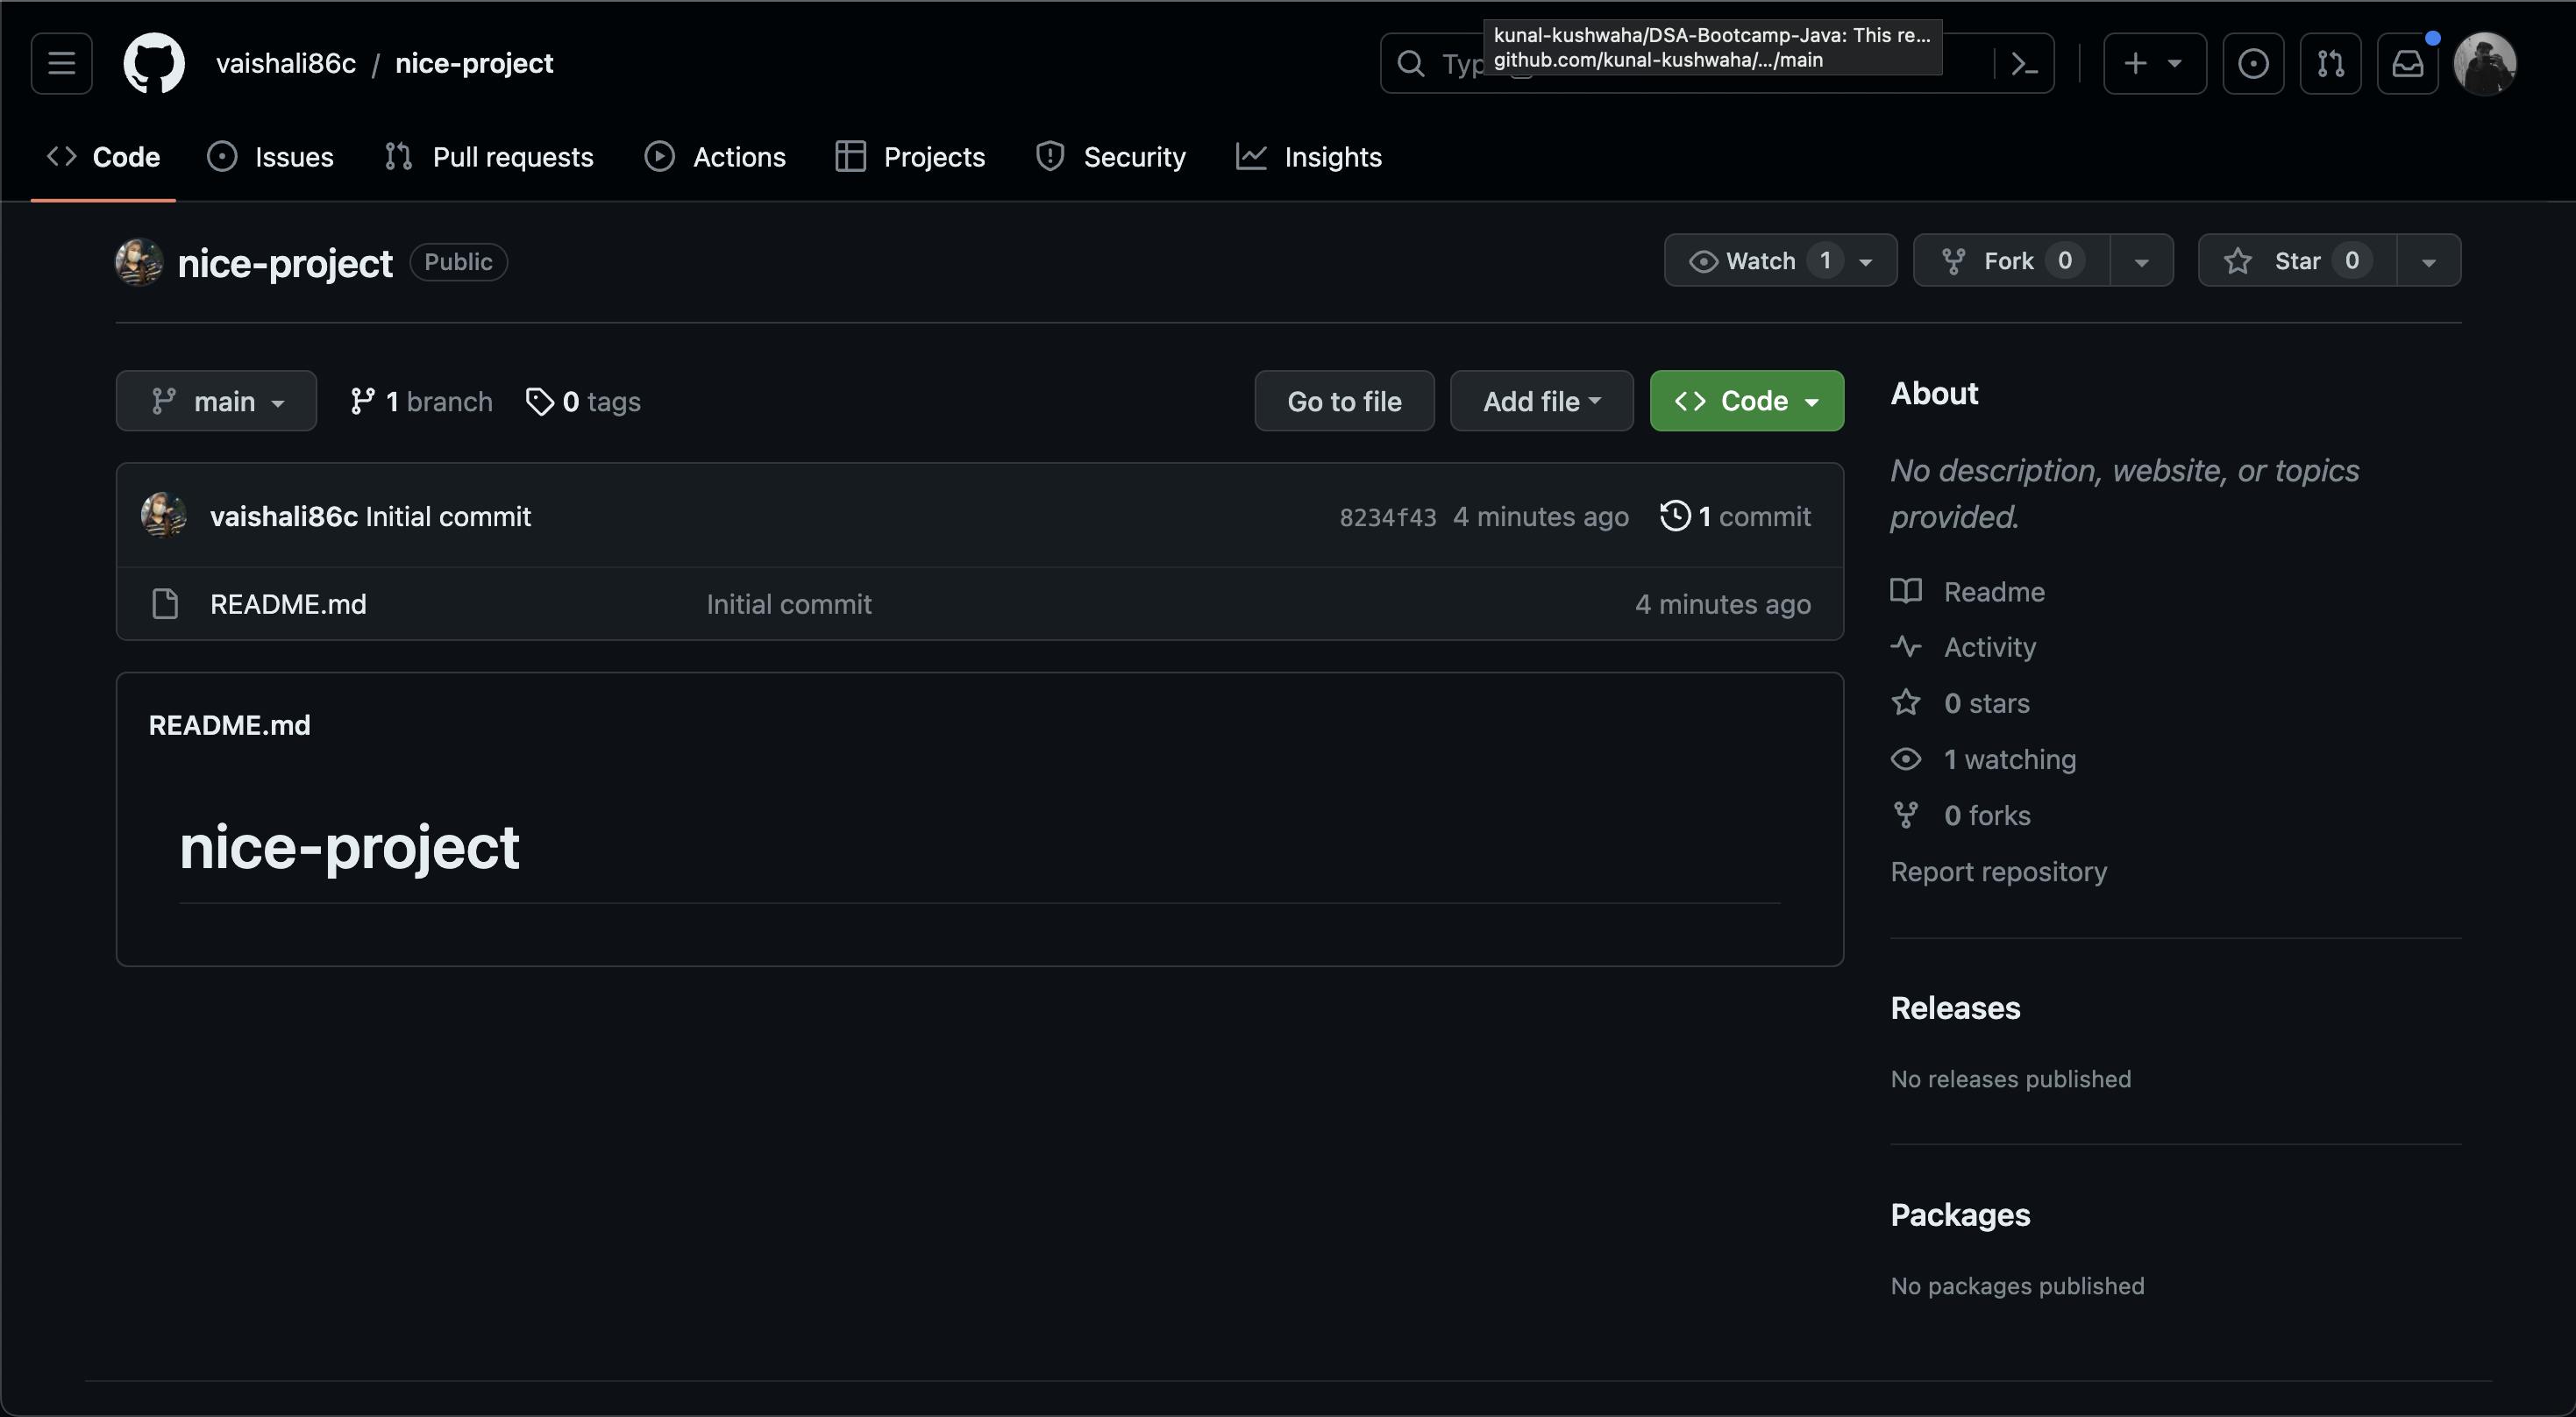
To fork this project, you have to click on the Fork option.

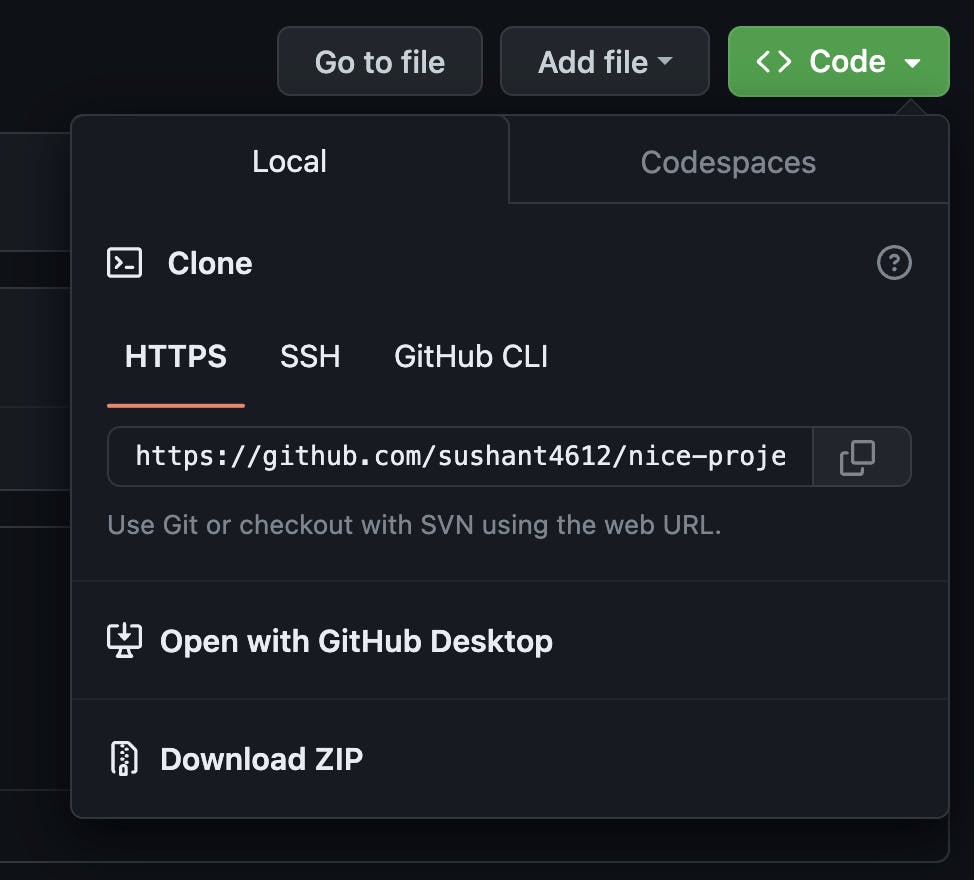
After forking this to your account, this is a copy of the original project. Now you can do anything with this project. First, we need to make a copy of it to our system. To do so, clone the repository. To clone, copy the link of the forked one. To get the link, click on the green colored Code icon. You will get the HTTP link. Copy the link.
What is Cloning?
Cloning in Git is a process that allows you to make an exact copy of a repository from a remote server (like GitHub) to your local machine. In simple terms, it's like downloading a project from the internet to your computer, so you can work on it locally.
When you clone a repository, you get the entire version history, all the files, and the entire project's structure. This means you have access to all the code and commit history that exists on the remote repository.
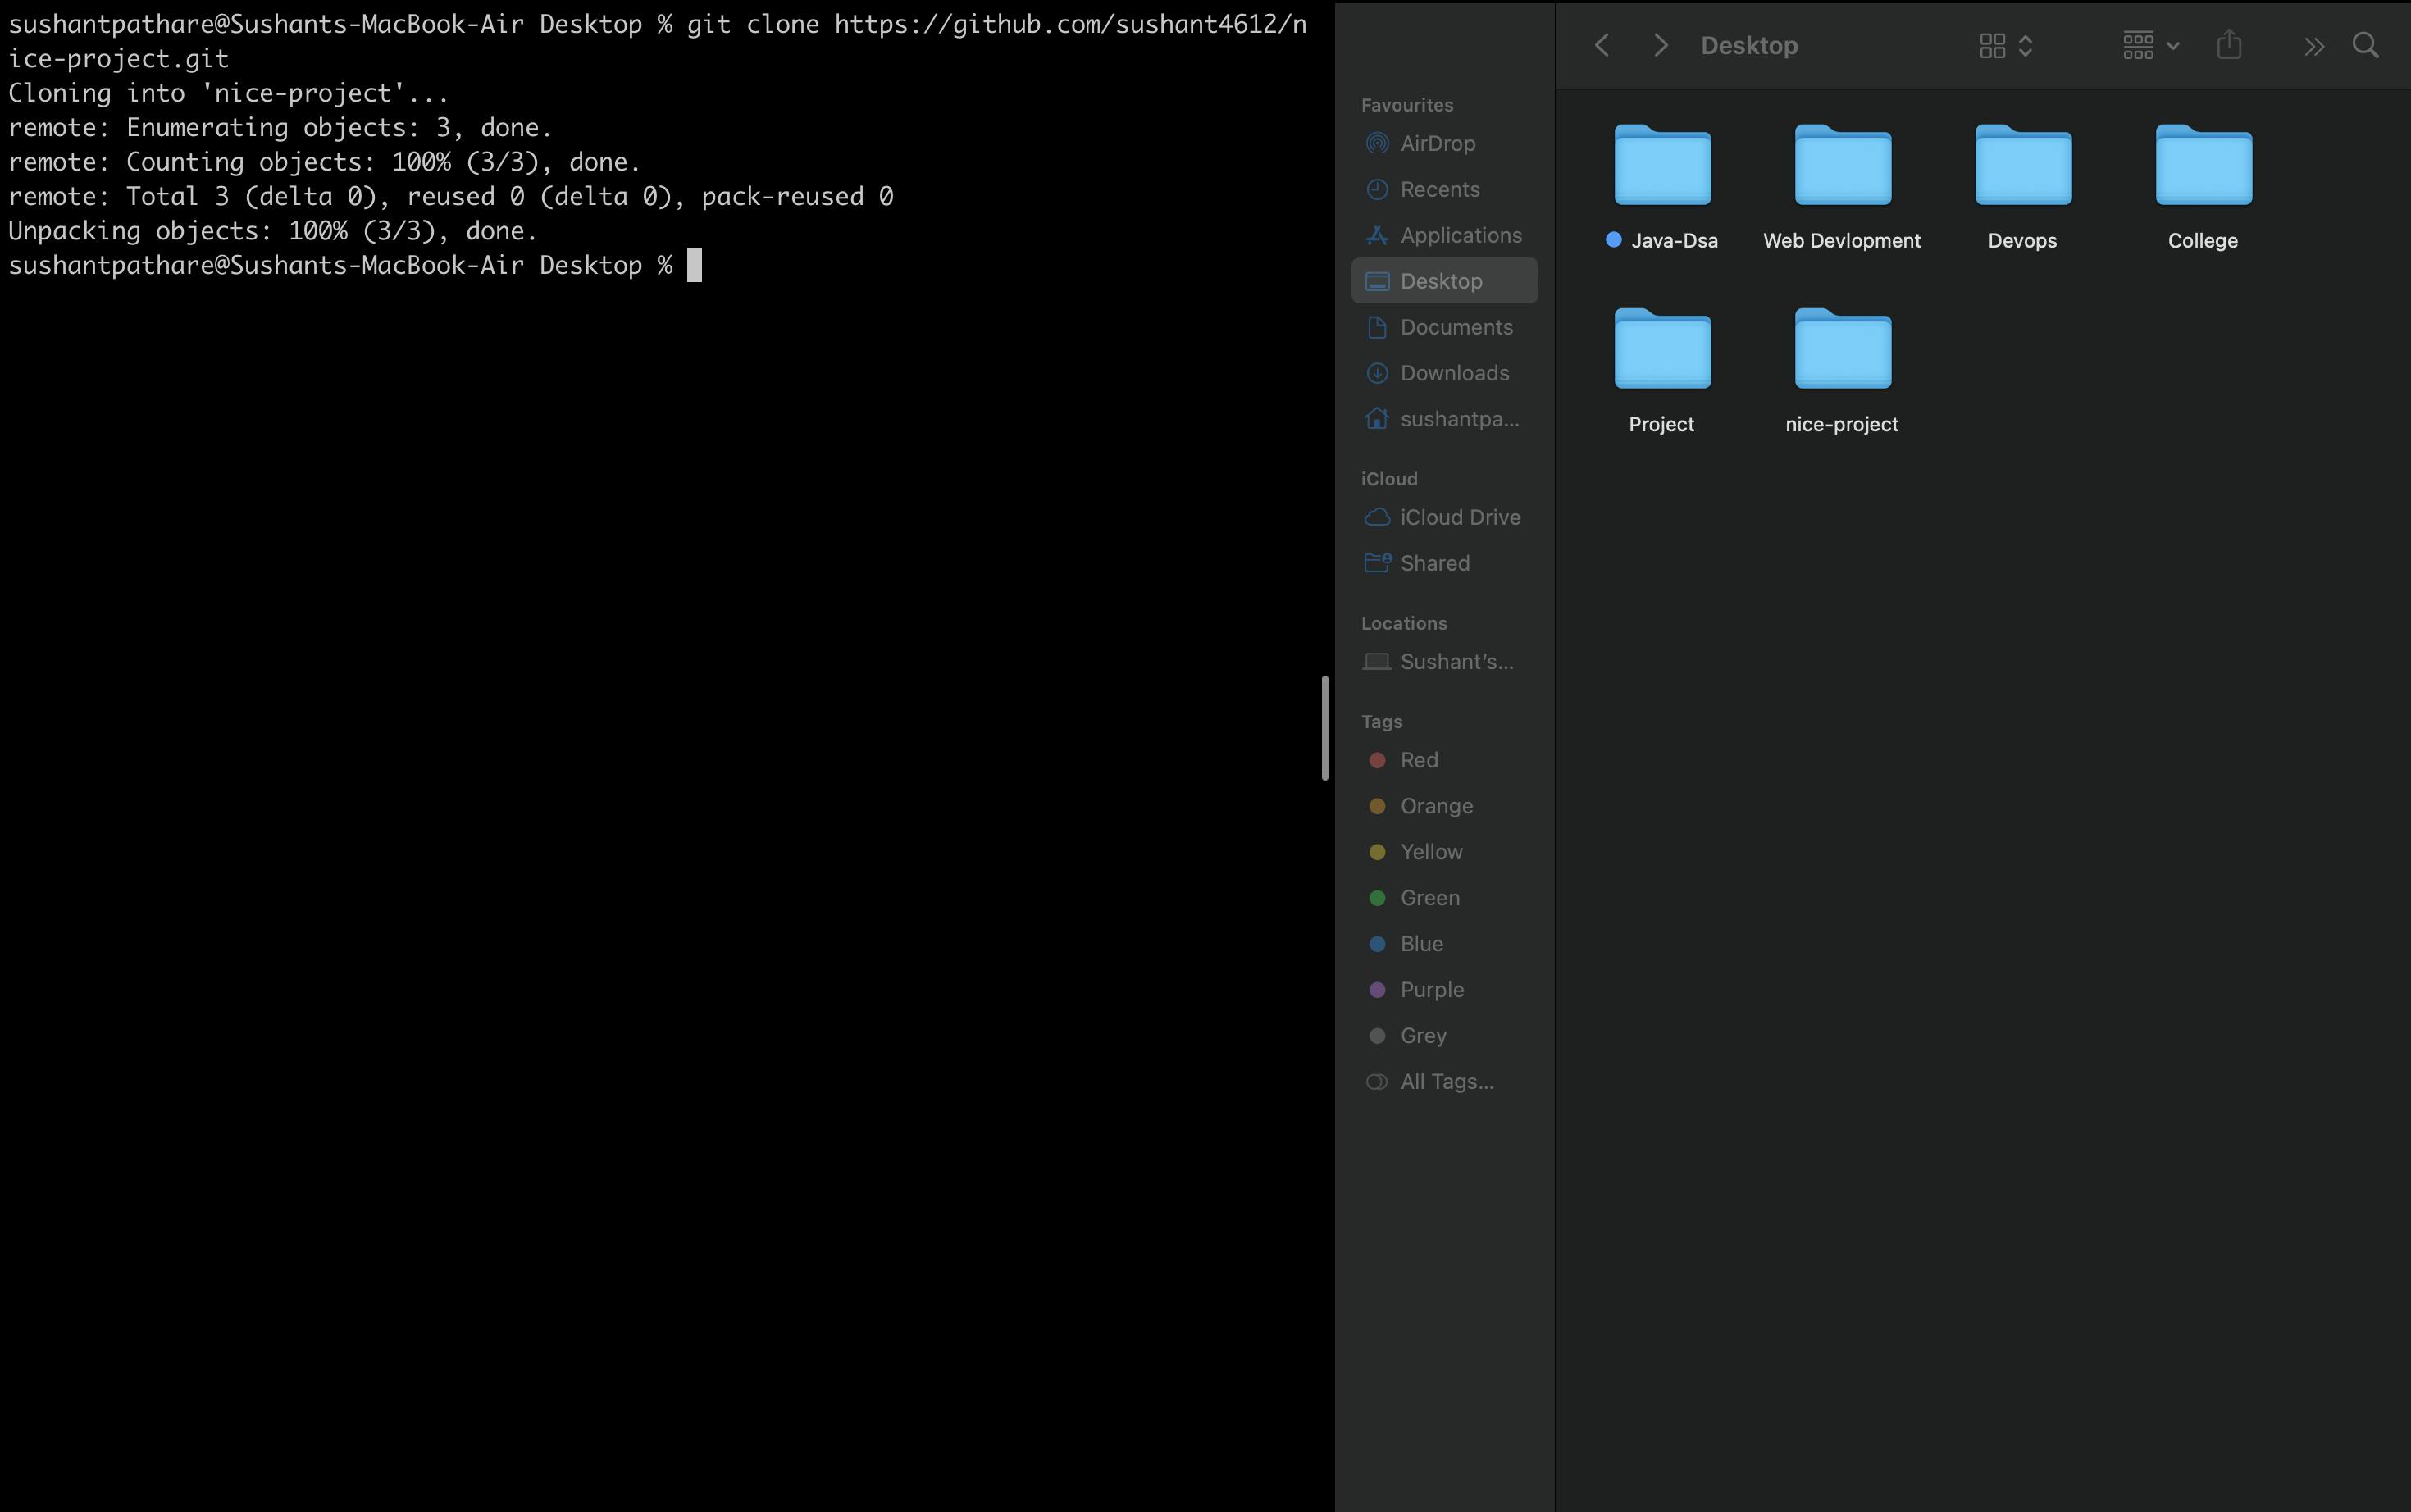
To clone the repository, go to the terminal and type the command git clone <URL>.
Now that the repository is cloned, let's make some changes to the file. A good practice is to create branches to work on the project, so let's create a branch.
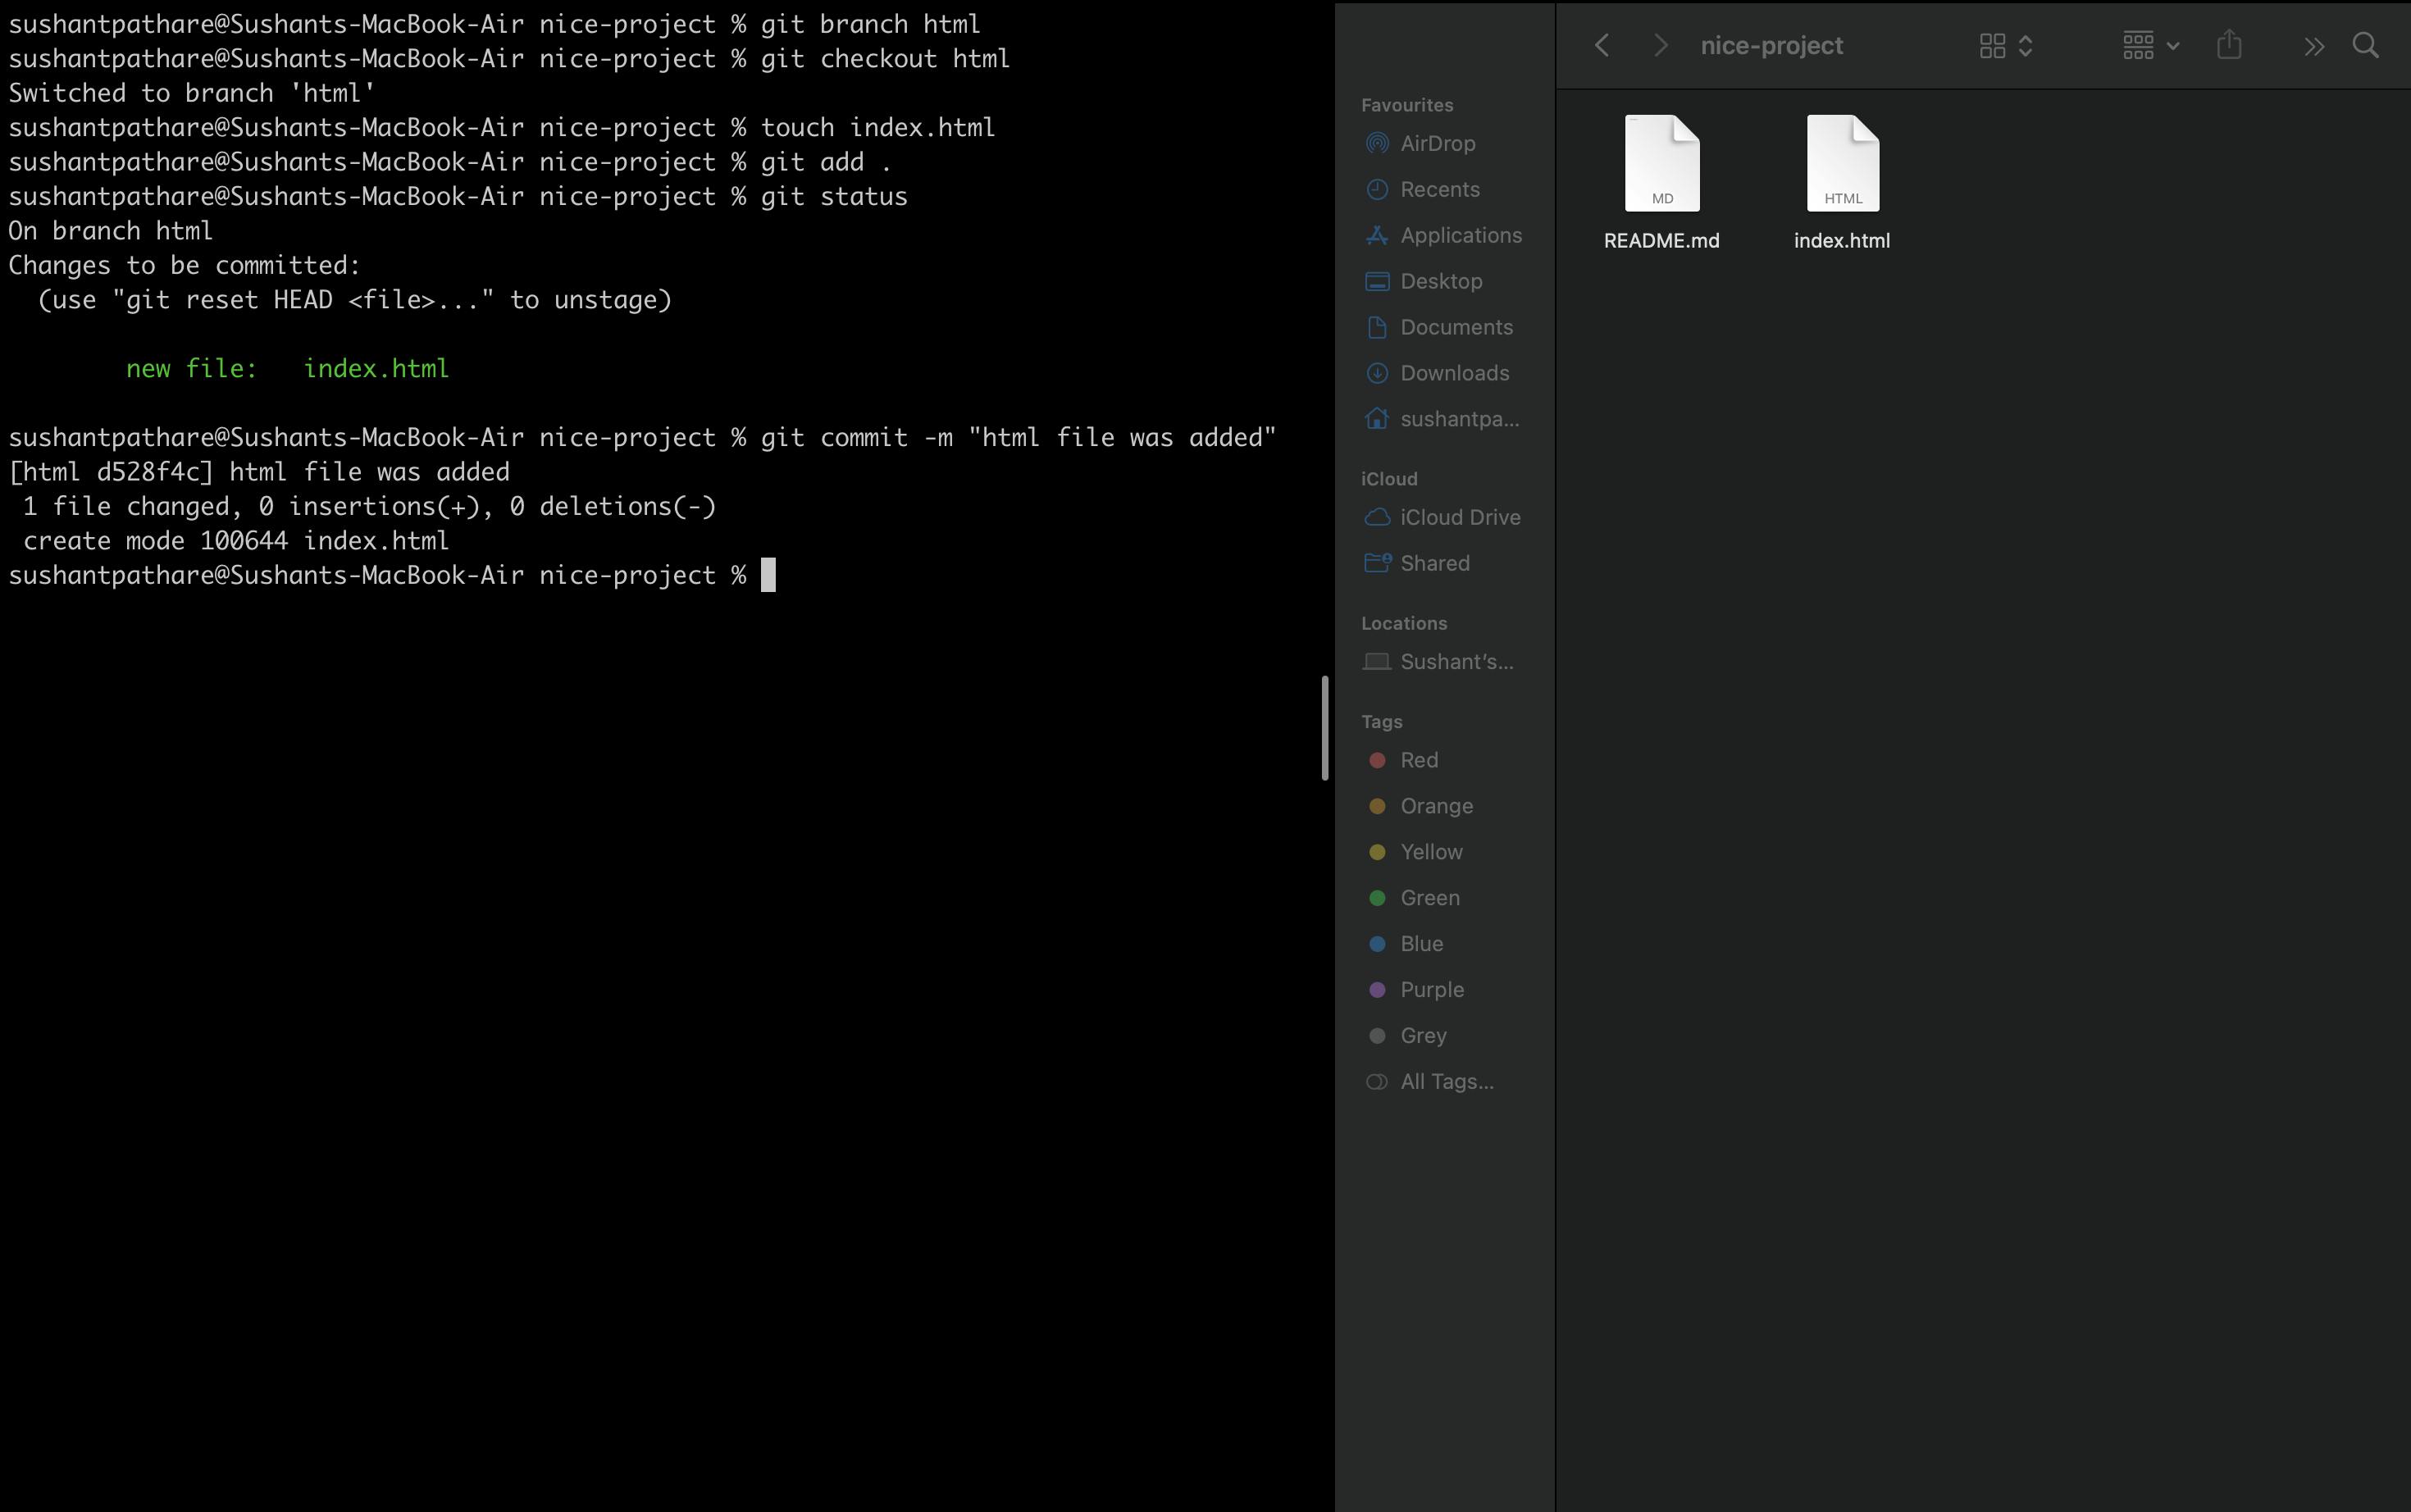
I created a branch named html and added a file to that branch. Now, let's push those changes to our forked repository. Use the command git push origin html to do so.
After doing so, go to your repository on GitHub. You will see an option for Compare & Pull Request Now, what is a pull request?
What is pull request?
Pull requests are the way we contribute to group projects or open source projects.
For instance, a user xyz forks a repository of abc and makes changes to that repository. Now Harry can make a pull request to abc, but it’s up to abc to accept or decline it. It’s like saying, “abc, would you please pull my changes?”
Let's make our pull request :
Go to your repo and click on the option Compare & Pull Request

After that, you will have the option to create a pull request. You can explain your pull request in the comments
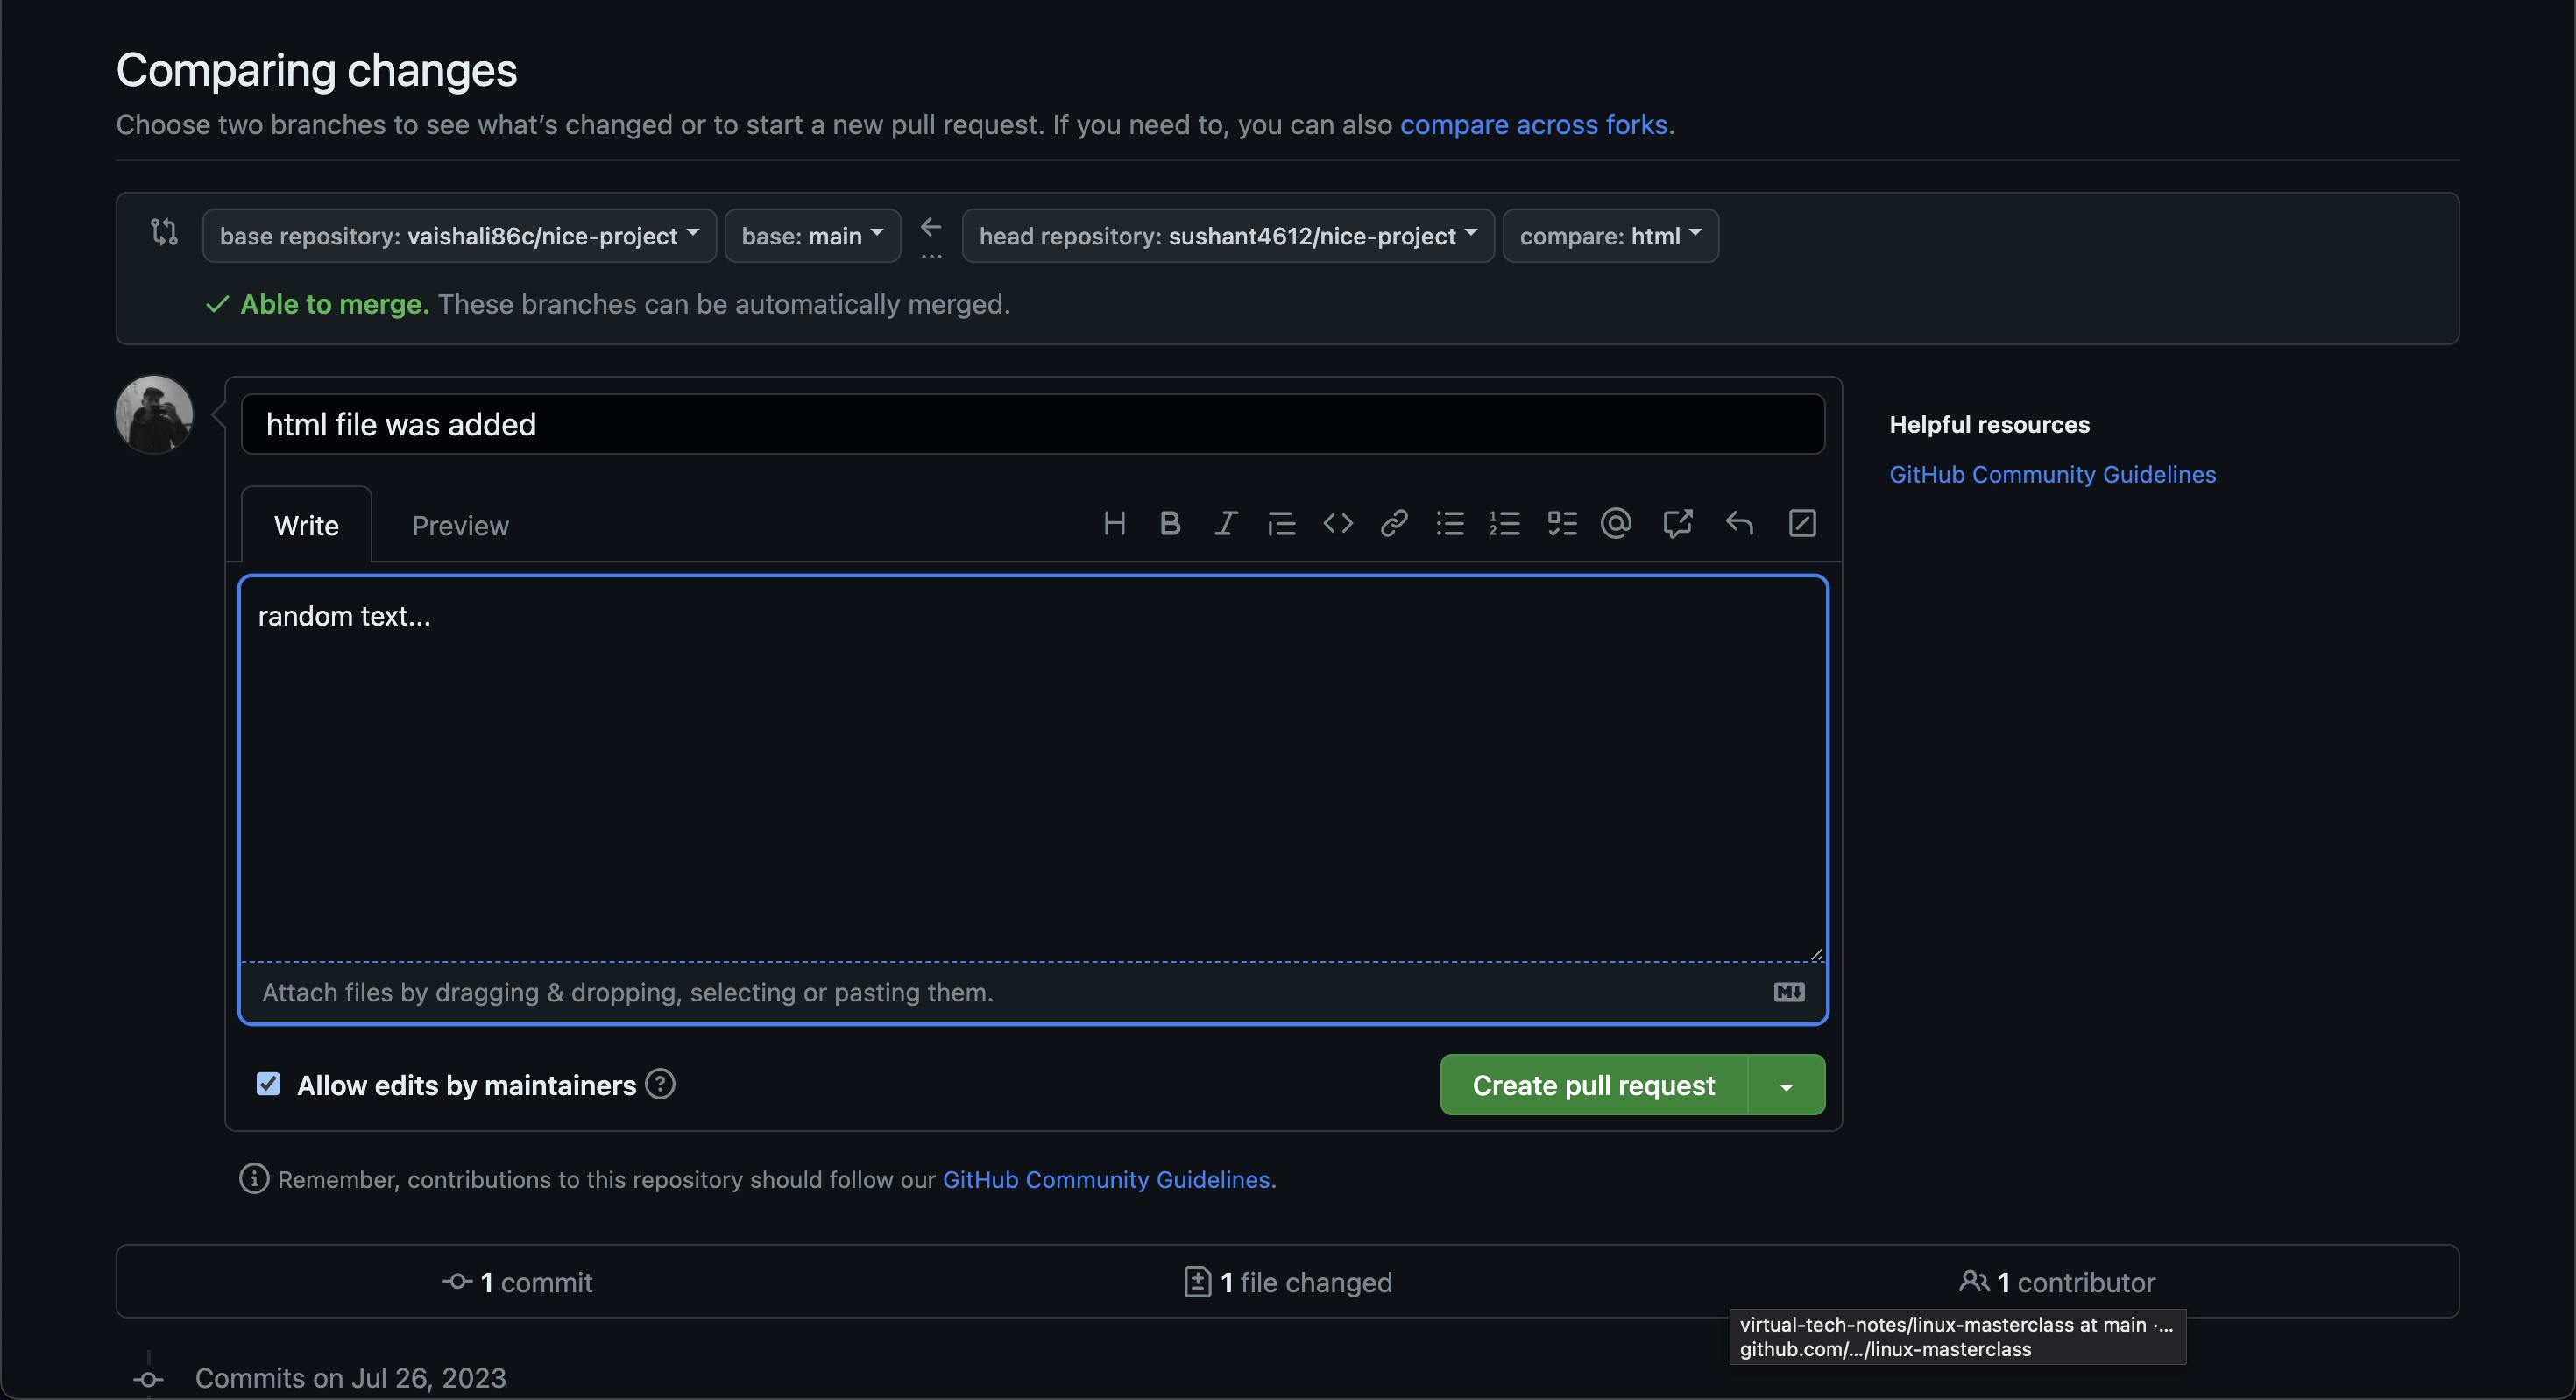
After that, click on Create Pull Request Congratulations, you have created your first pull request!
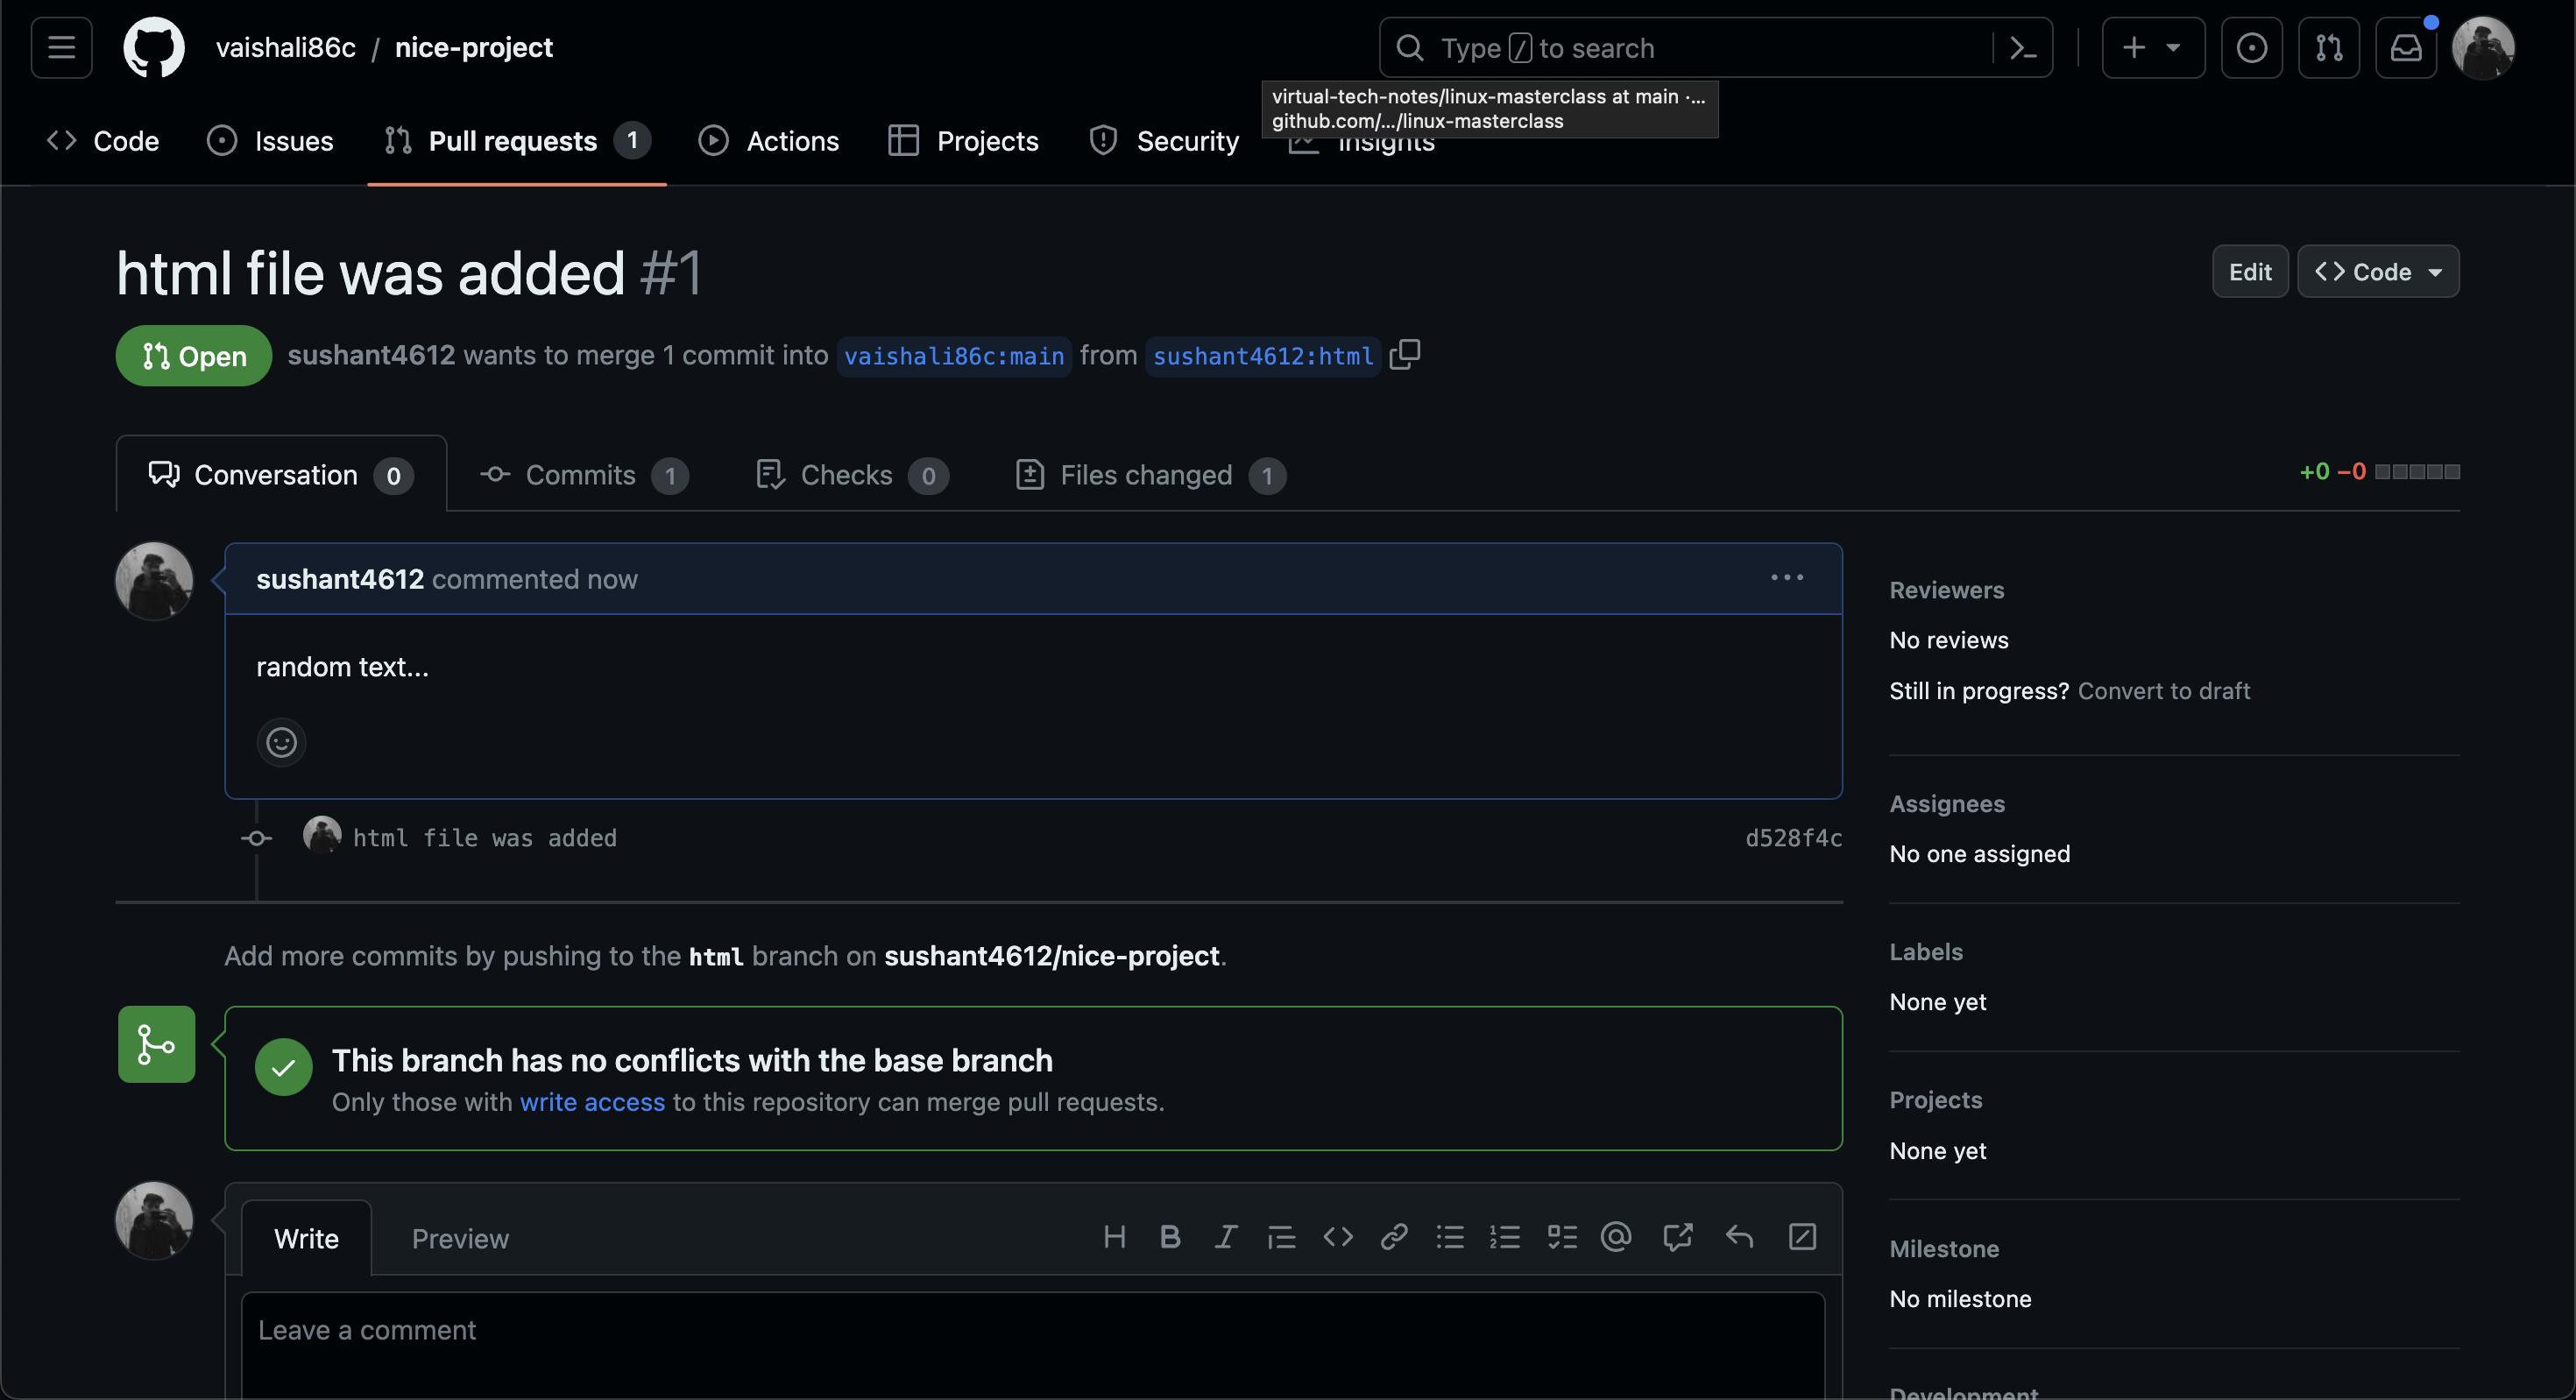
Now the project owner gets the notification of your pull request, and he/she can merge it.
Now, imagine you have cloned a repository, and after that, some changes were made in the original project. Let's see how we can sync our forked project.
Sync your forked main branch
You can do this in two ways. The first one is simple: just go to your GitHub repo, which you forked, and click the Sync fork option.

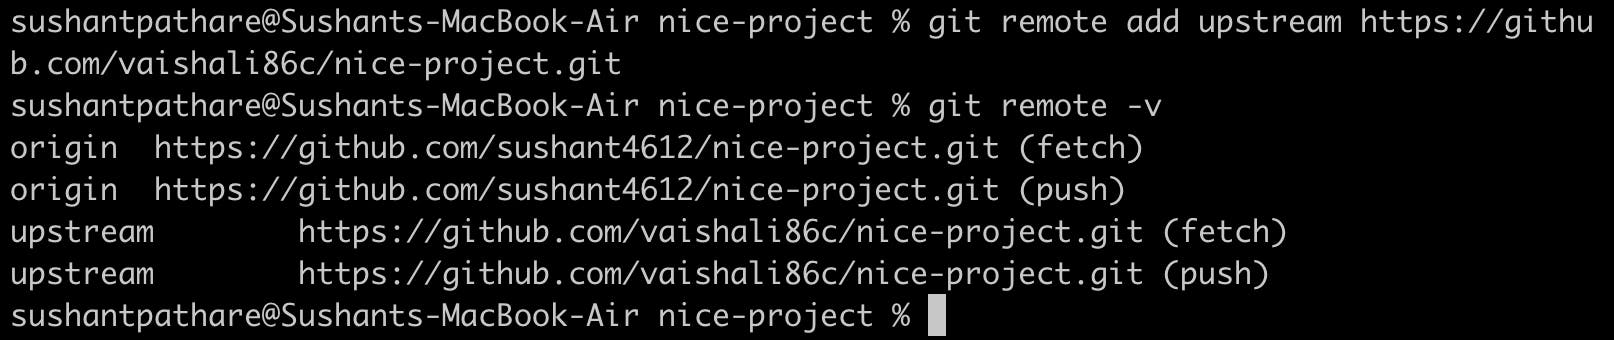
Secondly, to do this through the terminal, we first have to add the upstream URL. The term "upstream URL" refers to the remote repository from which you forked your project. When you fork a repository, you create a copy of the original repository under your GitHub account. The upstream URL is the link to the original repository from which you made the fork.
The command to add an upstream URL is git remote add upstream <URL>
To check whether the URL is added or not, type git remote -v.
To fetch the changes, type git fetch upstream.

Congratulations! If you've come this far, you've gained a solid understanding to kickstart your journey with Git and GitHub. Thank you for taking the time to read this guide. If you come across any corrections or have any doubts, feel free to leave a comment or message me on Twitter. You can find the link to my Twitter account in my profile.